
DIY Composting Toilet

When we first moved onto our land, we had absolutely no systems in place. We set up our first bathroom the day we moved here. I had already built the composting toilet, thank goodness! But a composting toilet was our only option for a toilet for the foreseeable future. We hope to change that one day, but for now it works pretty well!


Our original toilet lasted us about a year and a half and then the urine diverter broke and made the toilet very annoying to use. We found this Throne urine diverter and decided we would build a new and improved toilet and it is definitely the best one we’ve had. The urine diverter is easy to clean and it’s very sturdy so won’t break easily when removing it and placing it back. But more on that later…
Things you will need to build your own composting toilet:
3/4” plywood (2’ x 4’)
2- 1” x 2”s
Wood shavings

When building a composting toilet, there aren’t too many different ways you can do it. It usually consists of some kind of wood frame or box and a hole cut to fit the urine diverter in. It is worth noting that you don’t actually have to use a urine diverter if you don’t want to separate your liquids and solids. And if you aren’t ready to build a composting toilet and want to know more about them in general, check out the post below.
When you purchase this urine diverter, you get a digital copy of a stencil. Or you can download the stencil here. You will take this stencil and trace it onto your 3/4” plywood, There are three pieces- the top and the bottom which are the same shape and the back piece which is a rectangle. Trace these onto your wood and cut them out with a jigsaw.

The pieces that create the sidewalls should be cut out of the 1” x 2”s. You will need 10 of them. I believe the plans tell you to cut these to 18”. This would allow for you to use a 7 gallon bucket to collect your solids in. After using the toilet for a few months, we felt that 18” was a little too tall for us ladies so we cut them to 16”. We only ever use a 5 gallon bucket though, so something to think about. For us, our legs fully touching the ground when going to the bathroom is more important than having a bigger bucket. Space the pieces evenly around the edge of the top piece or use the stencil to show you where to put each one.
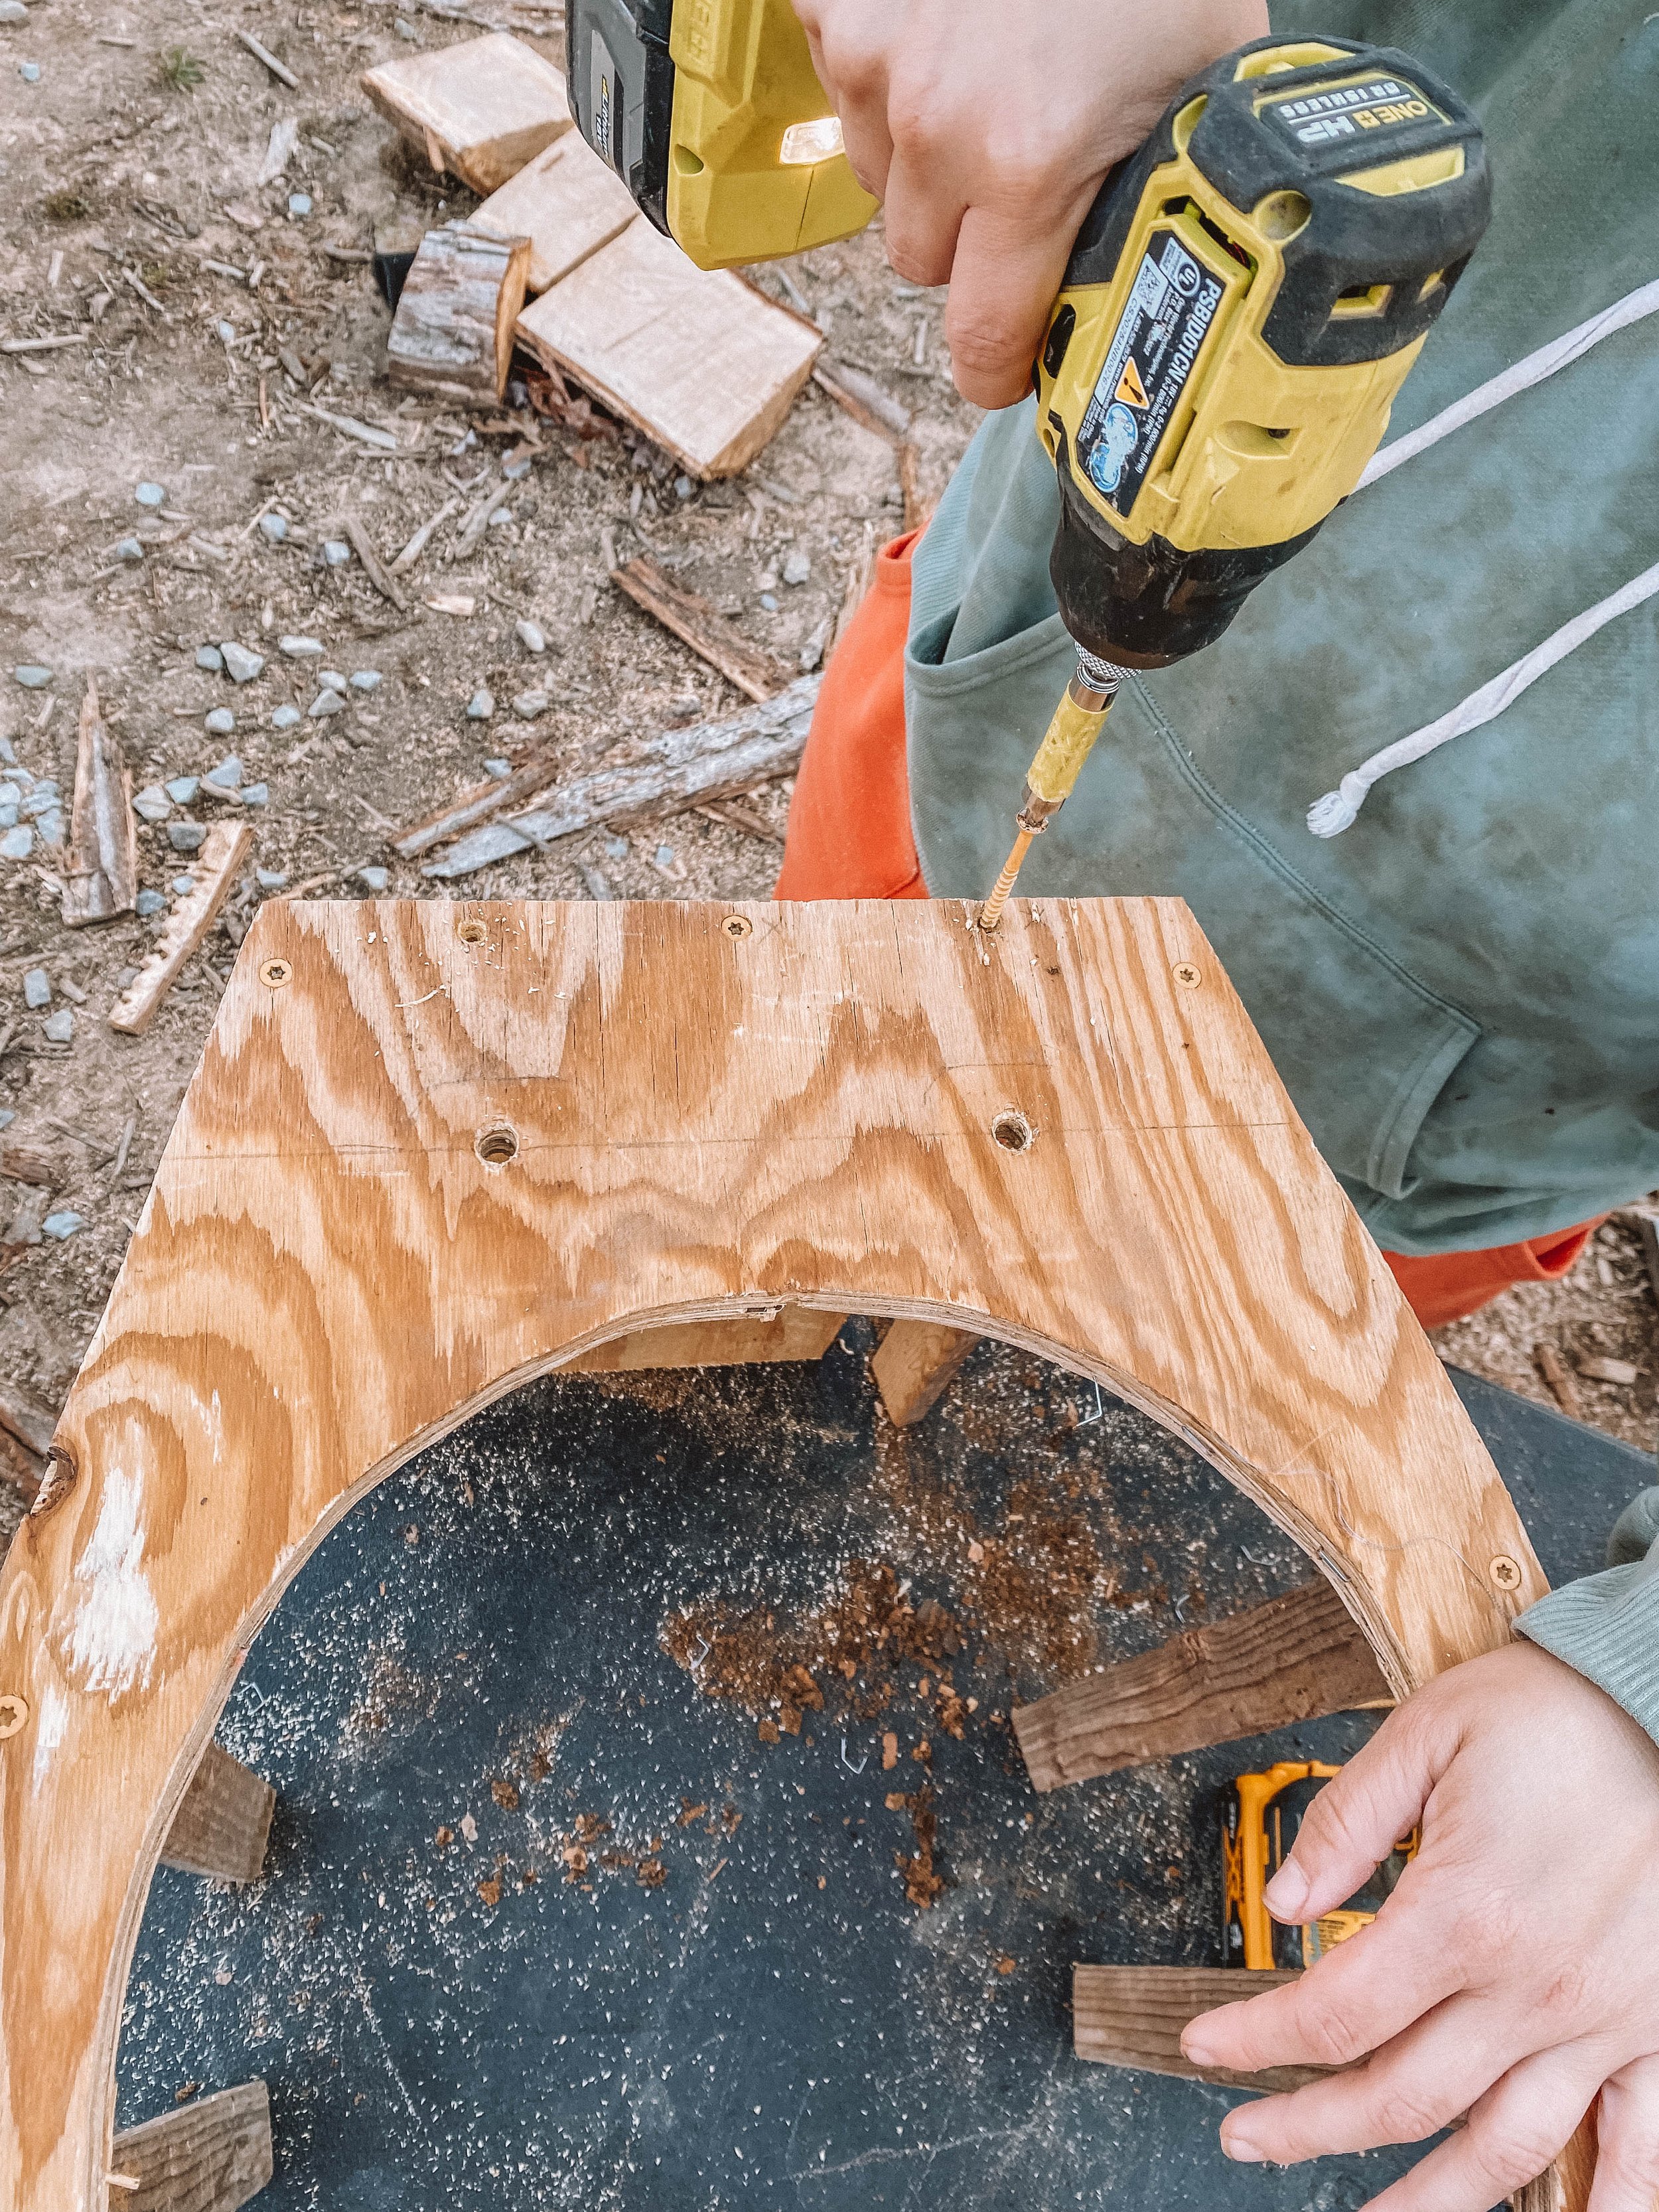
Each piece of 1” x 2” gets a screw and in the back piece we put 3 screws.
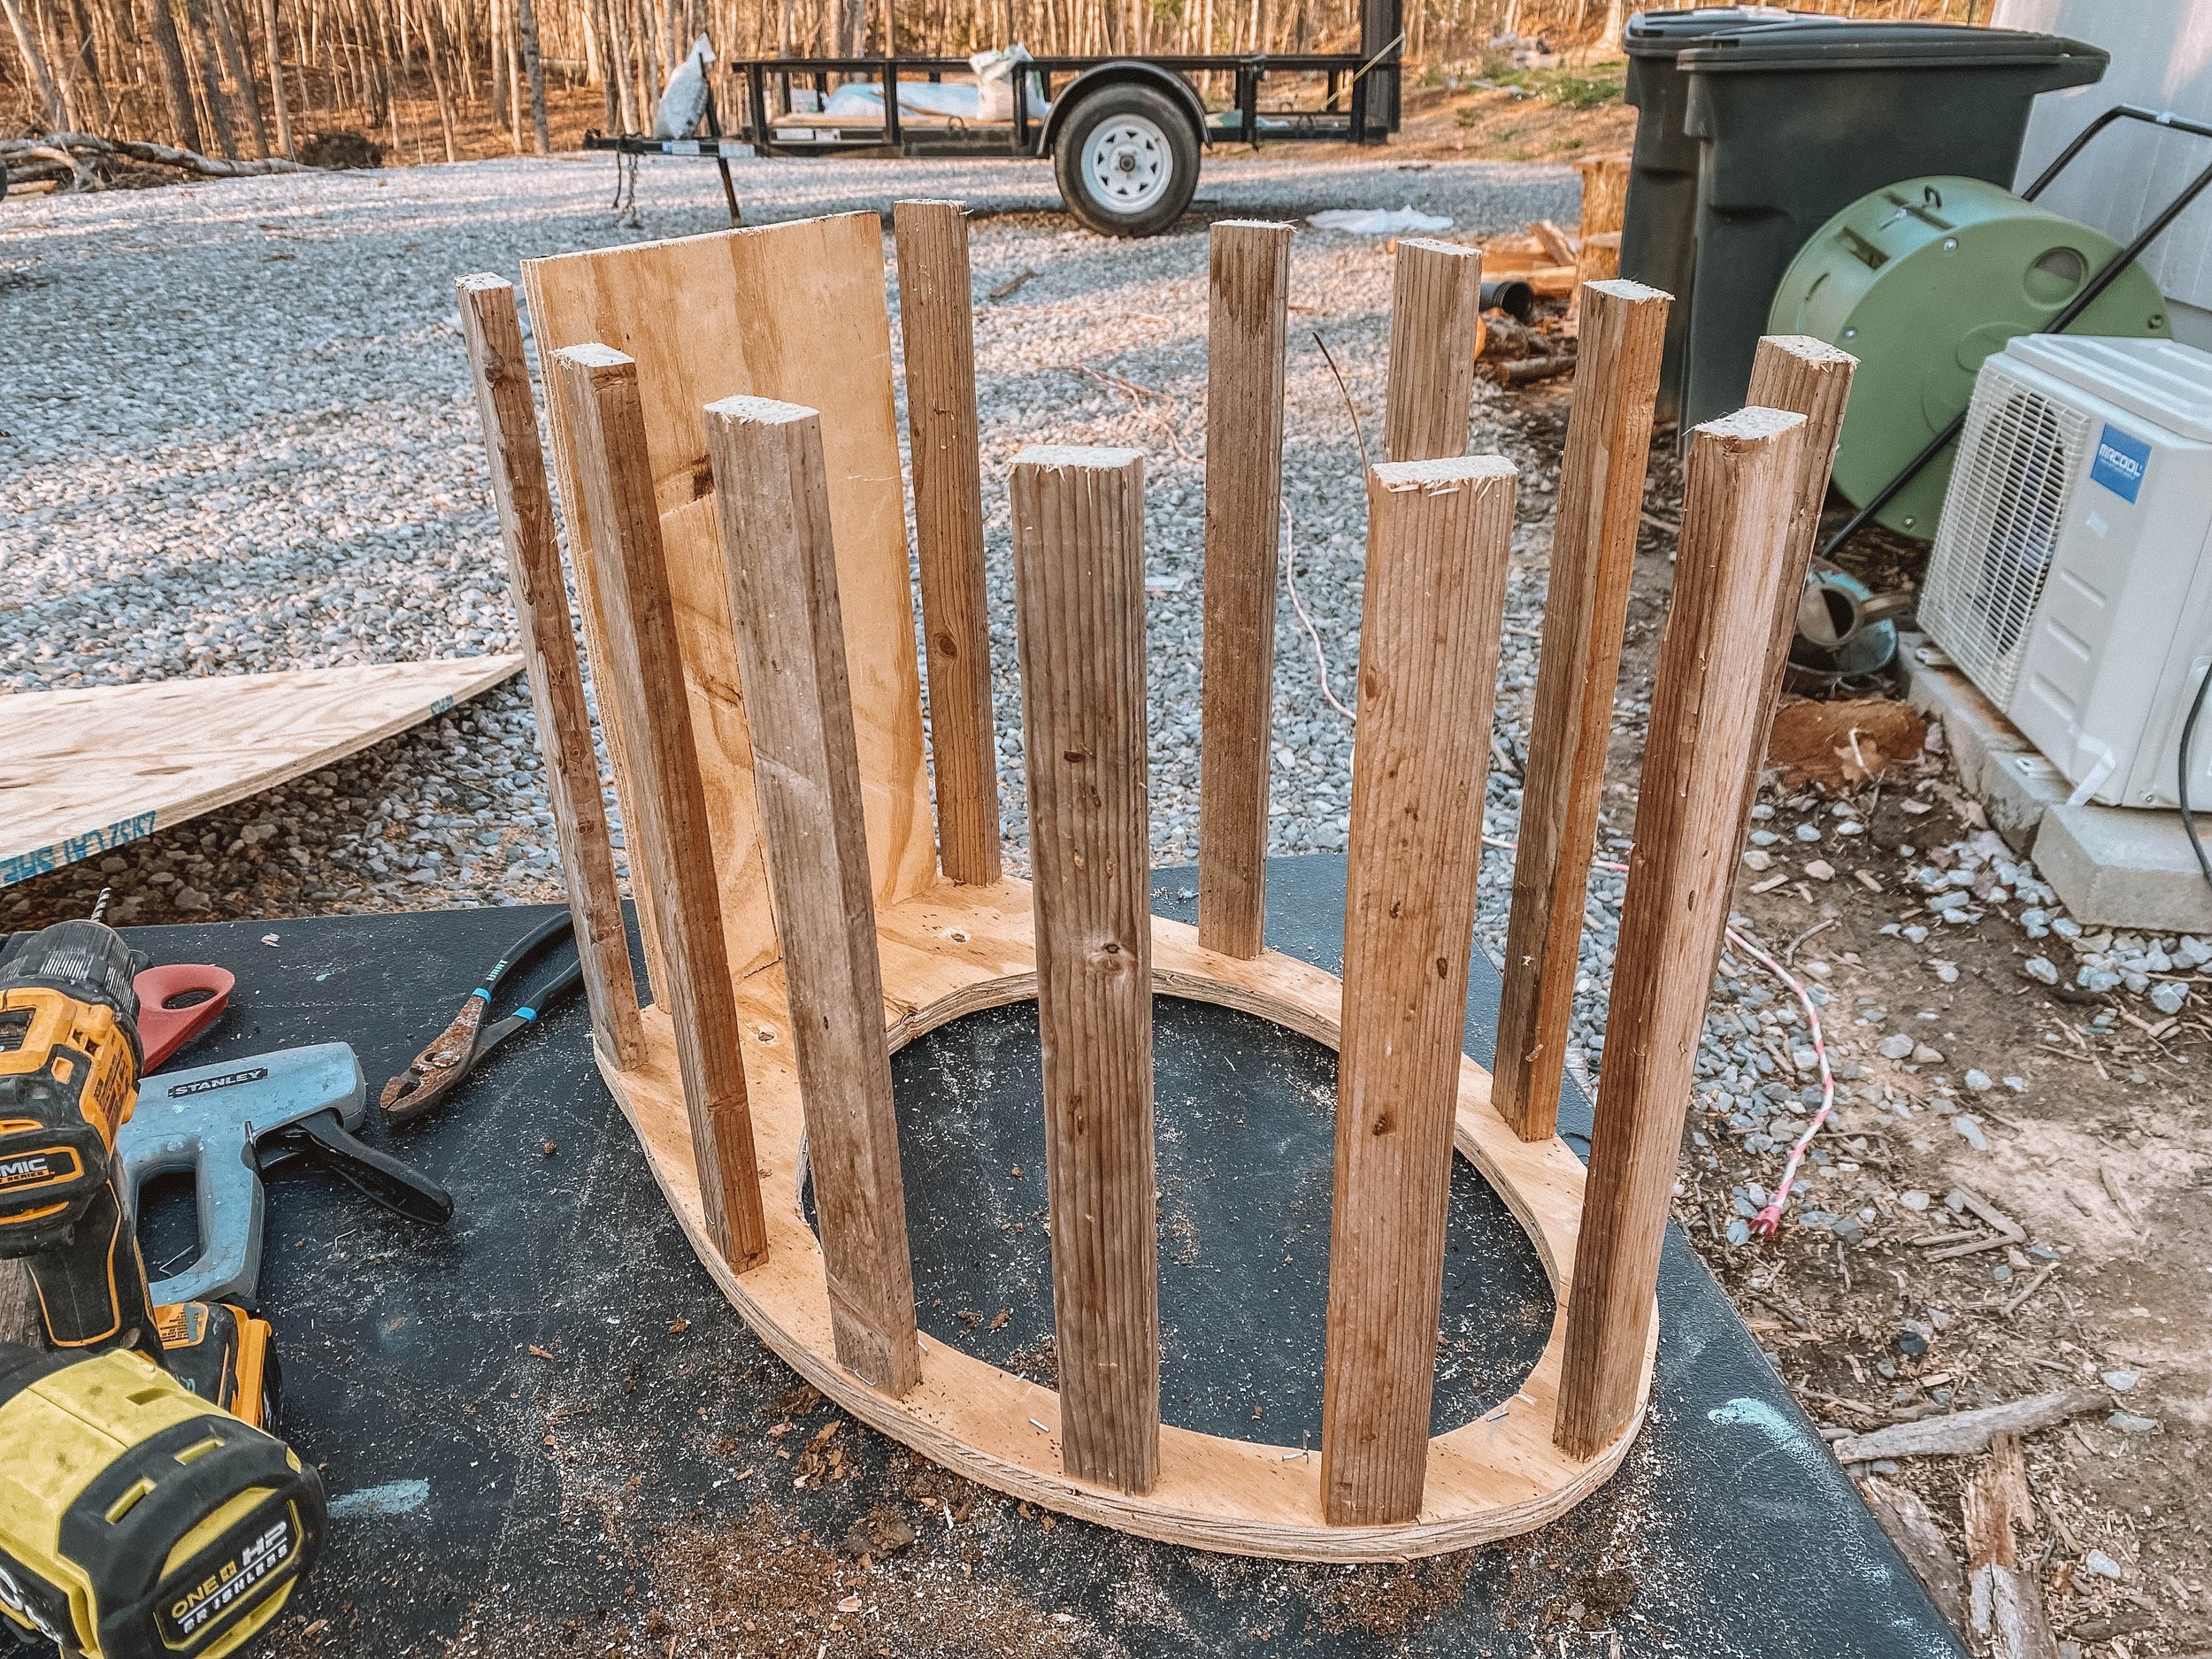
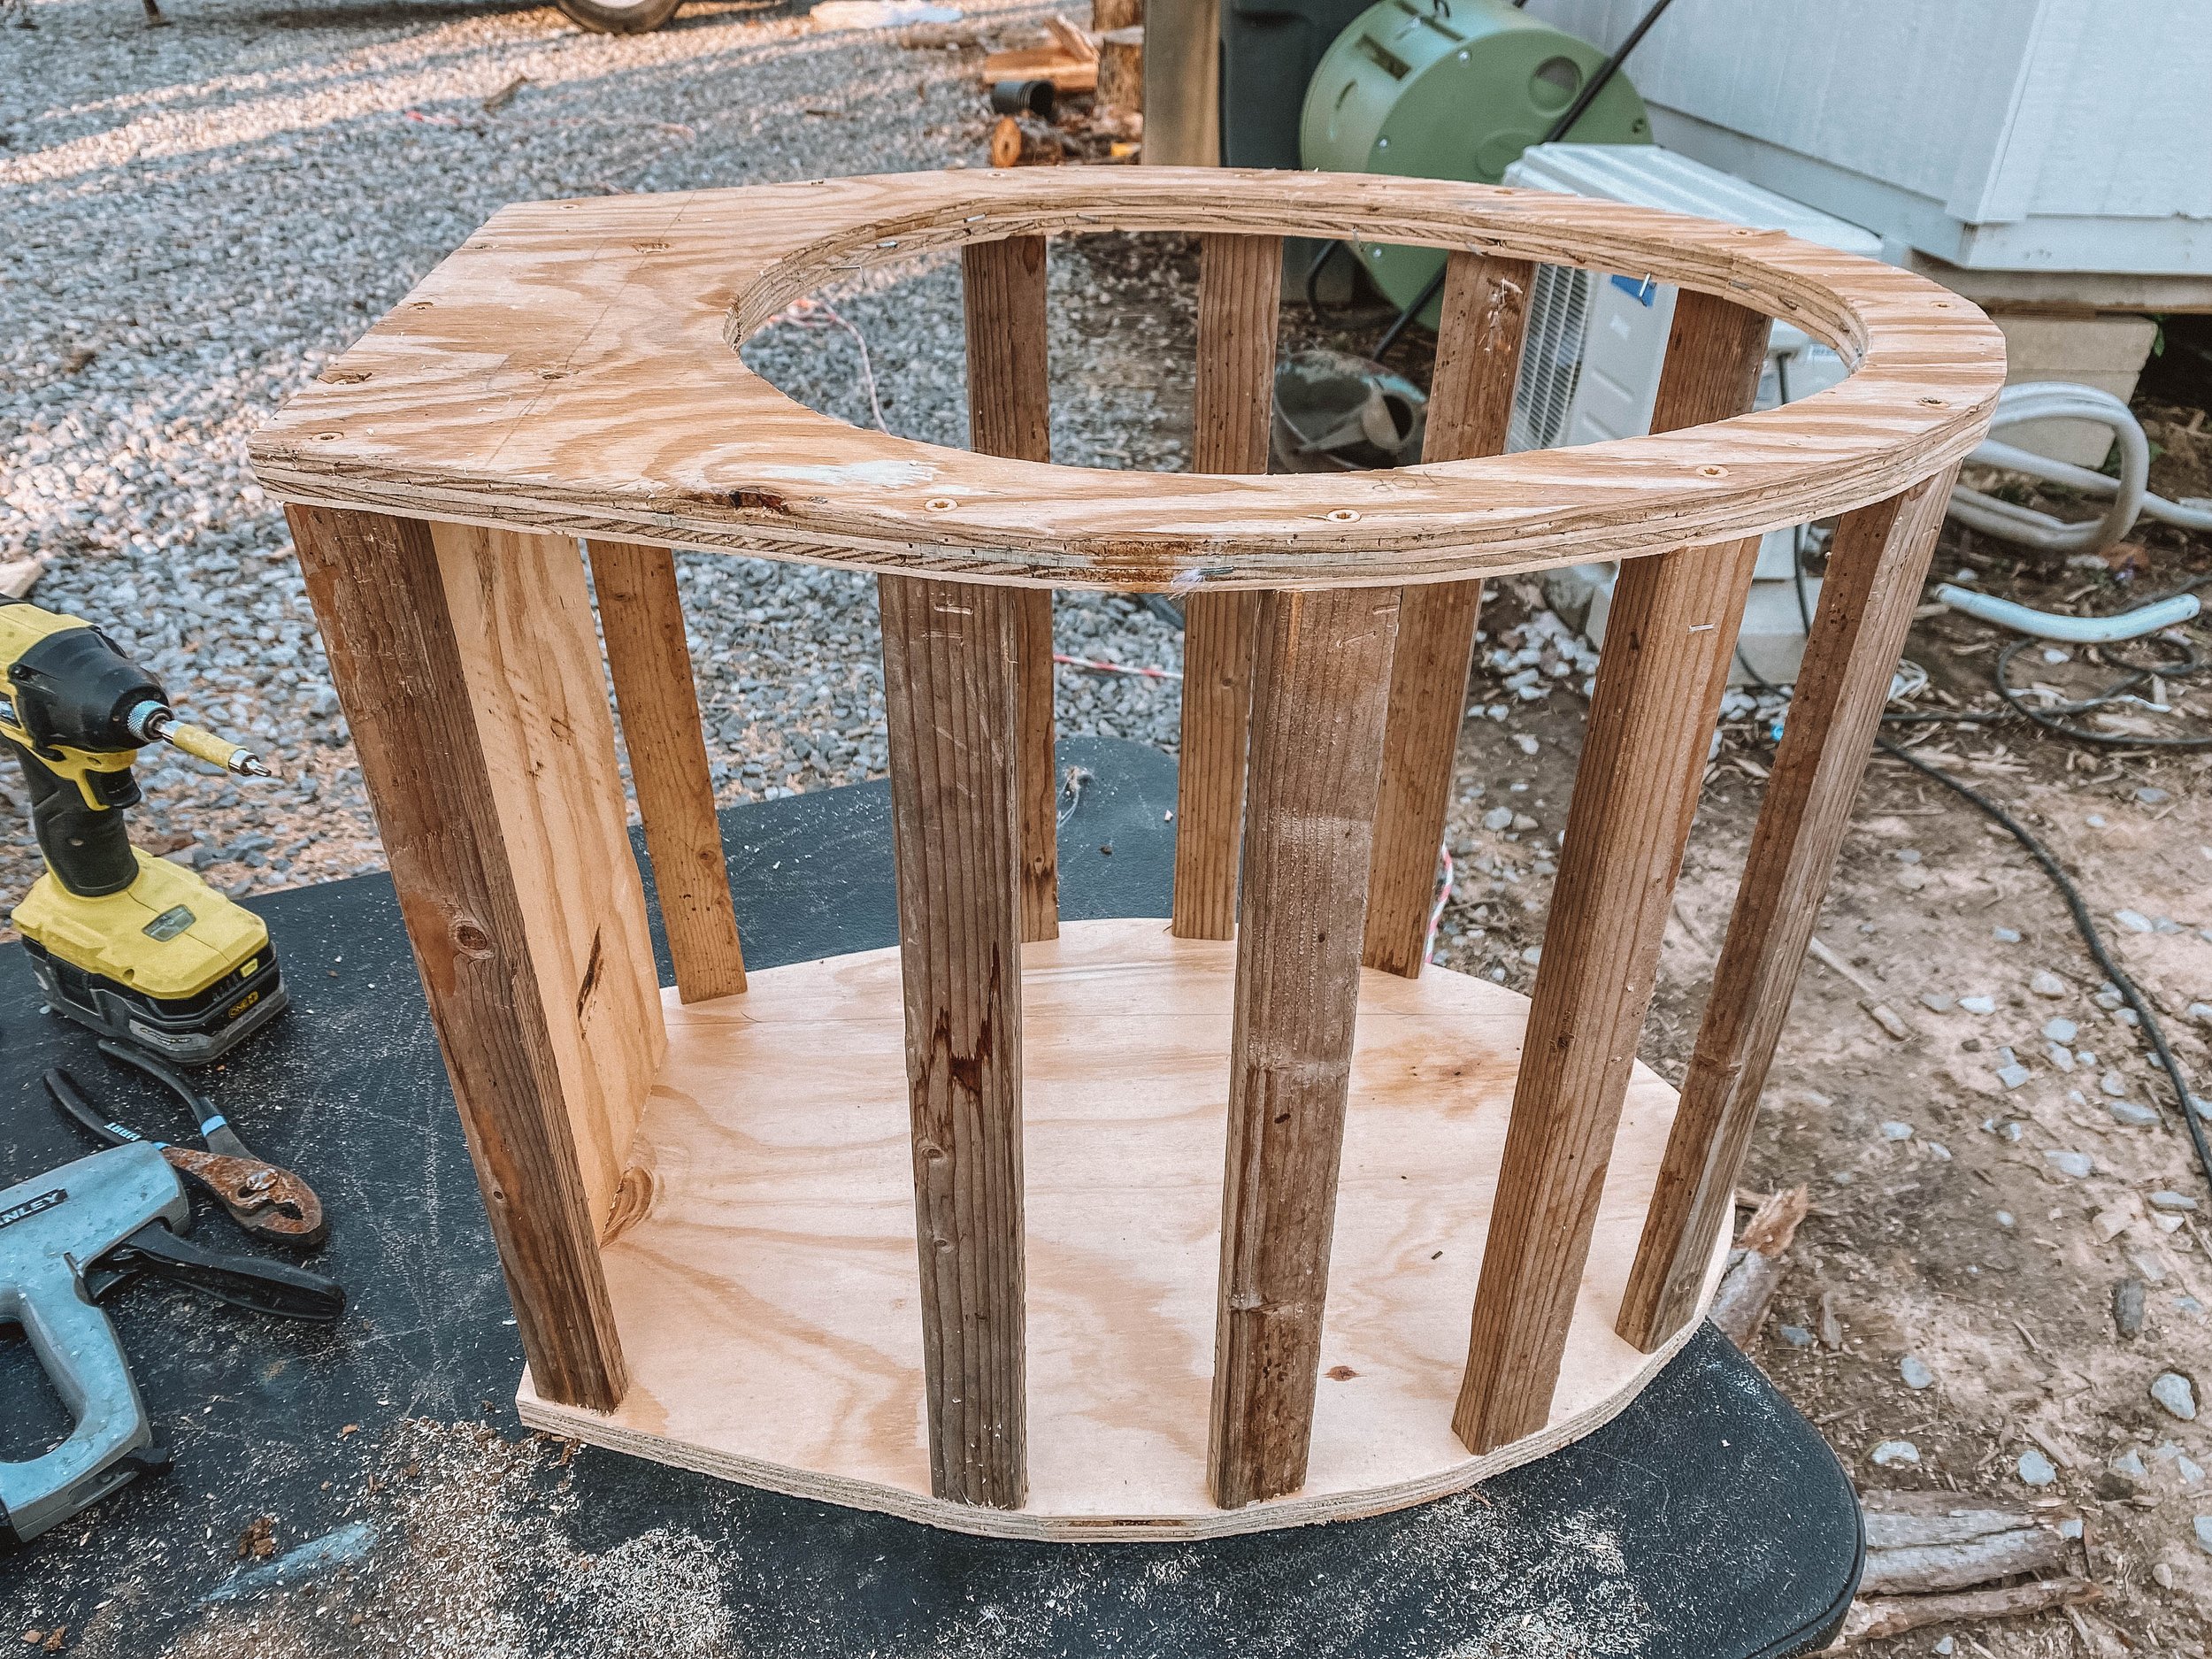
Once the top is attached, flip it over and start adding the bottom piece.

If it isn’t clear, the piece with the hole is the top and the solid piece is the bottom.

We are using 2 1/2” deck screws because that is what we had on hand.
Our 1” x 2”s were reused from an old project which is why they are so discolored. But we will be covering all of this up, so if you have scrap wood, use it!

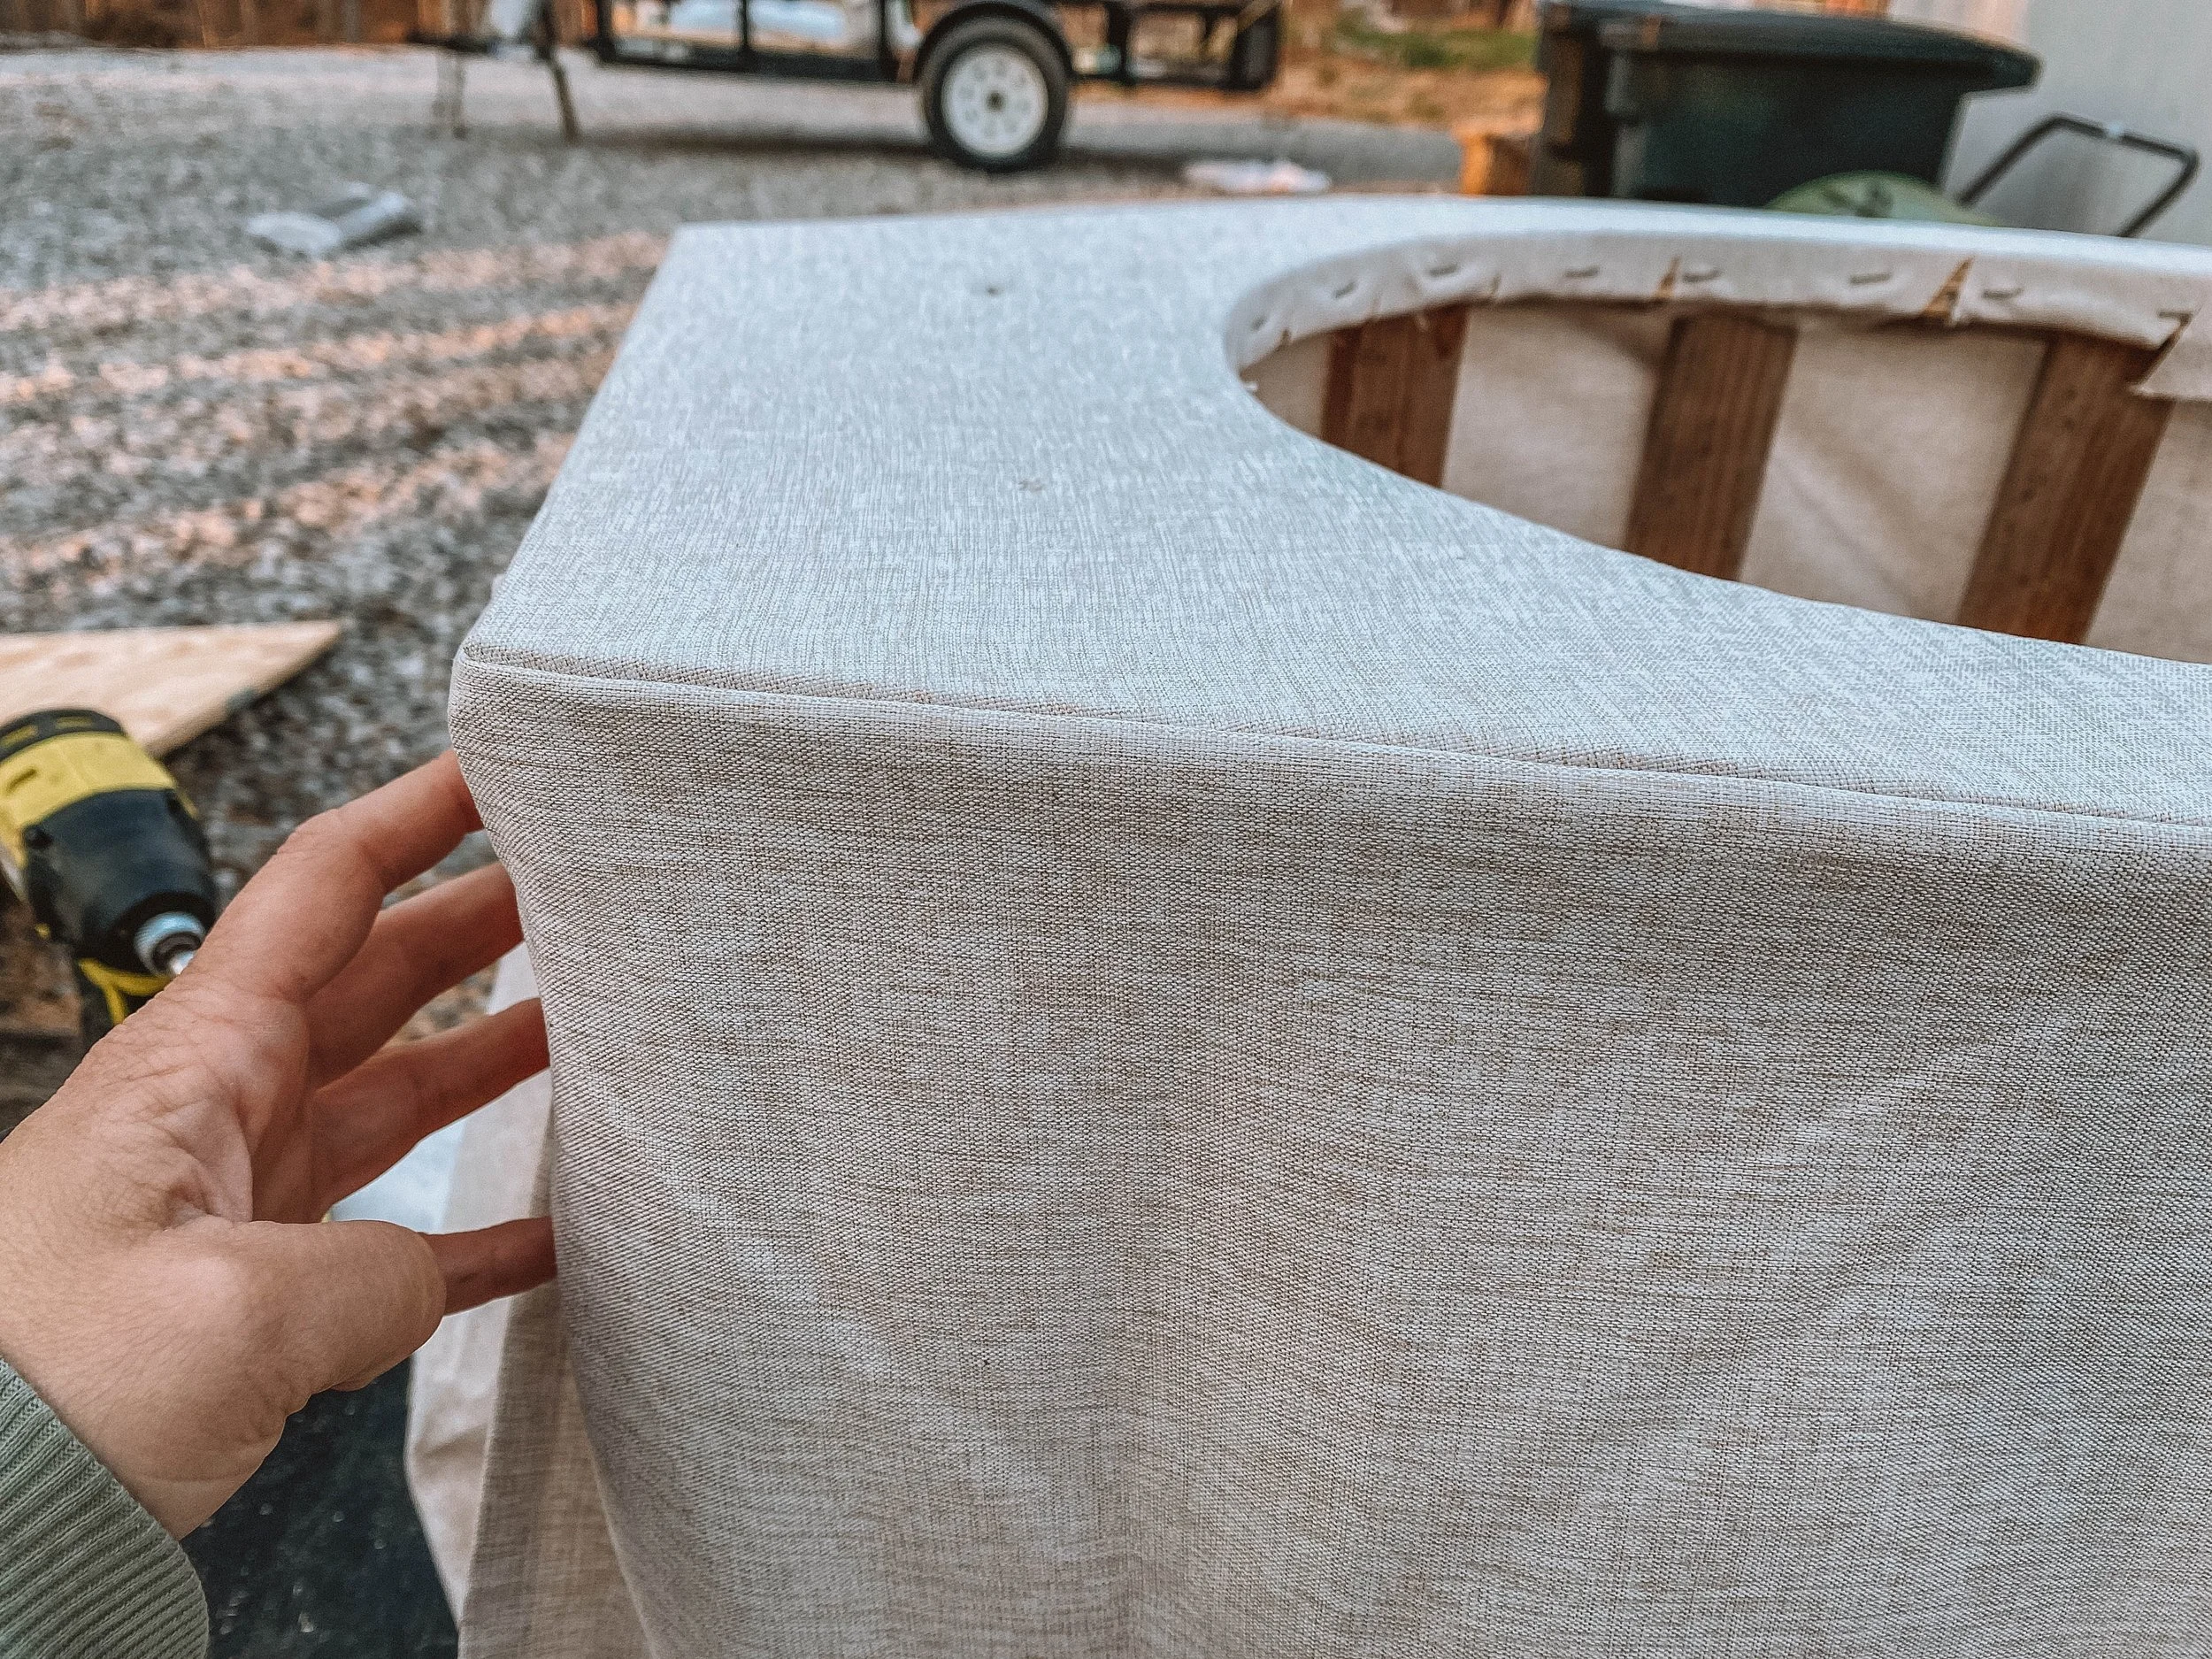
They way I'm covering the toilet is kind of like upholstering a piece of furniture. I started by attaching the top piece on the sides with staples.

This is the most interesting piece to do as you have to cut into the hole and tighten the fabric around all the curves. It helps to have two people so one person can hold the fabric taught while the other staples. As you can see in the picture, I cut slits on the inside to create the curve.
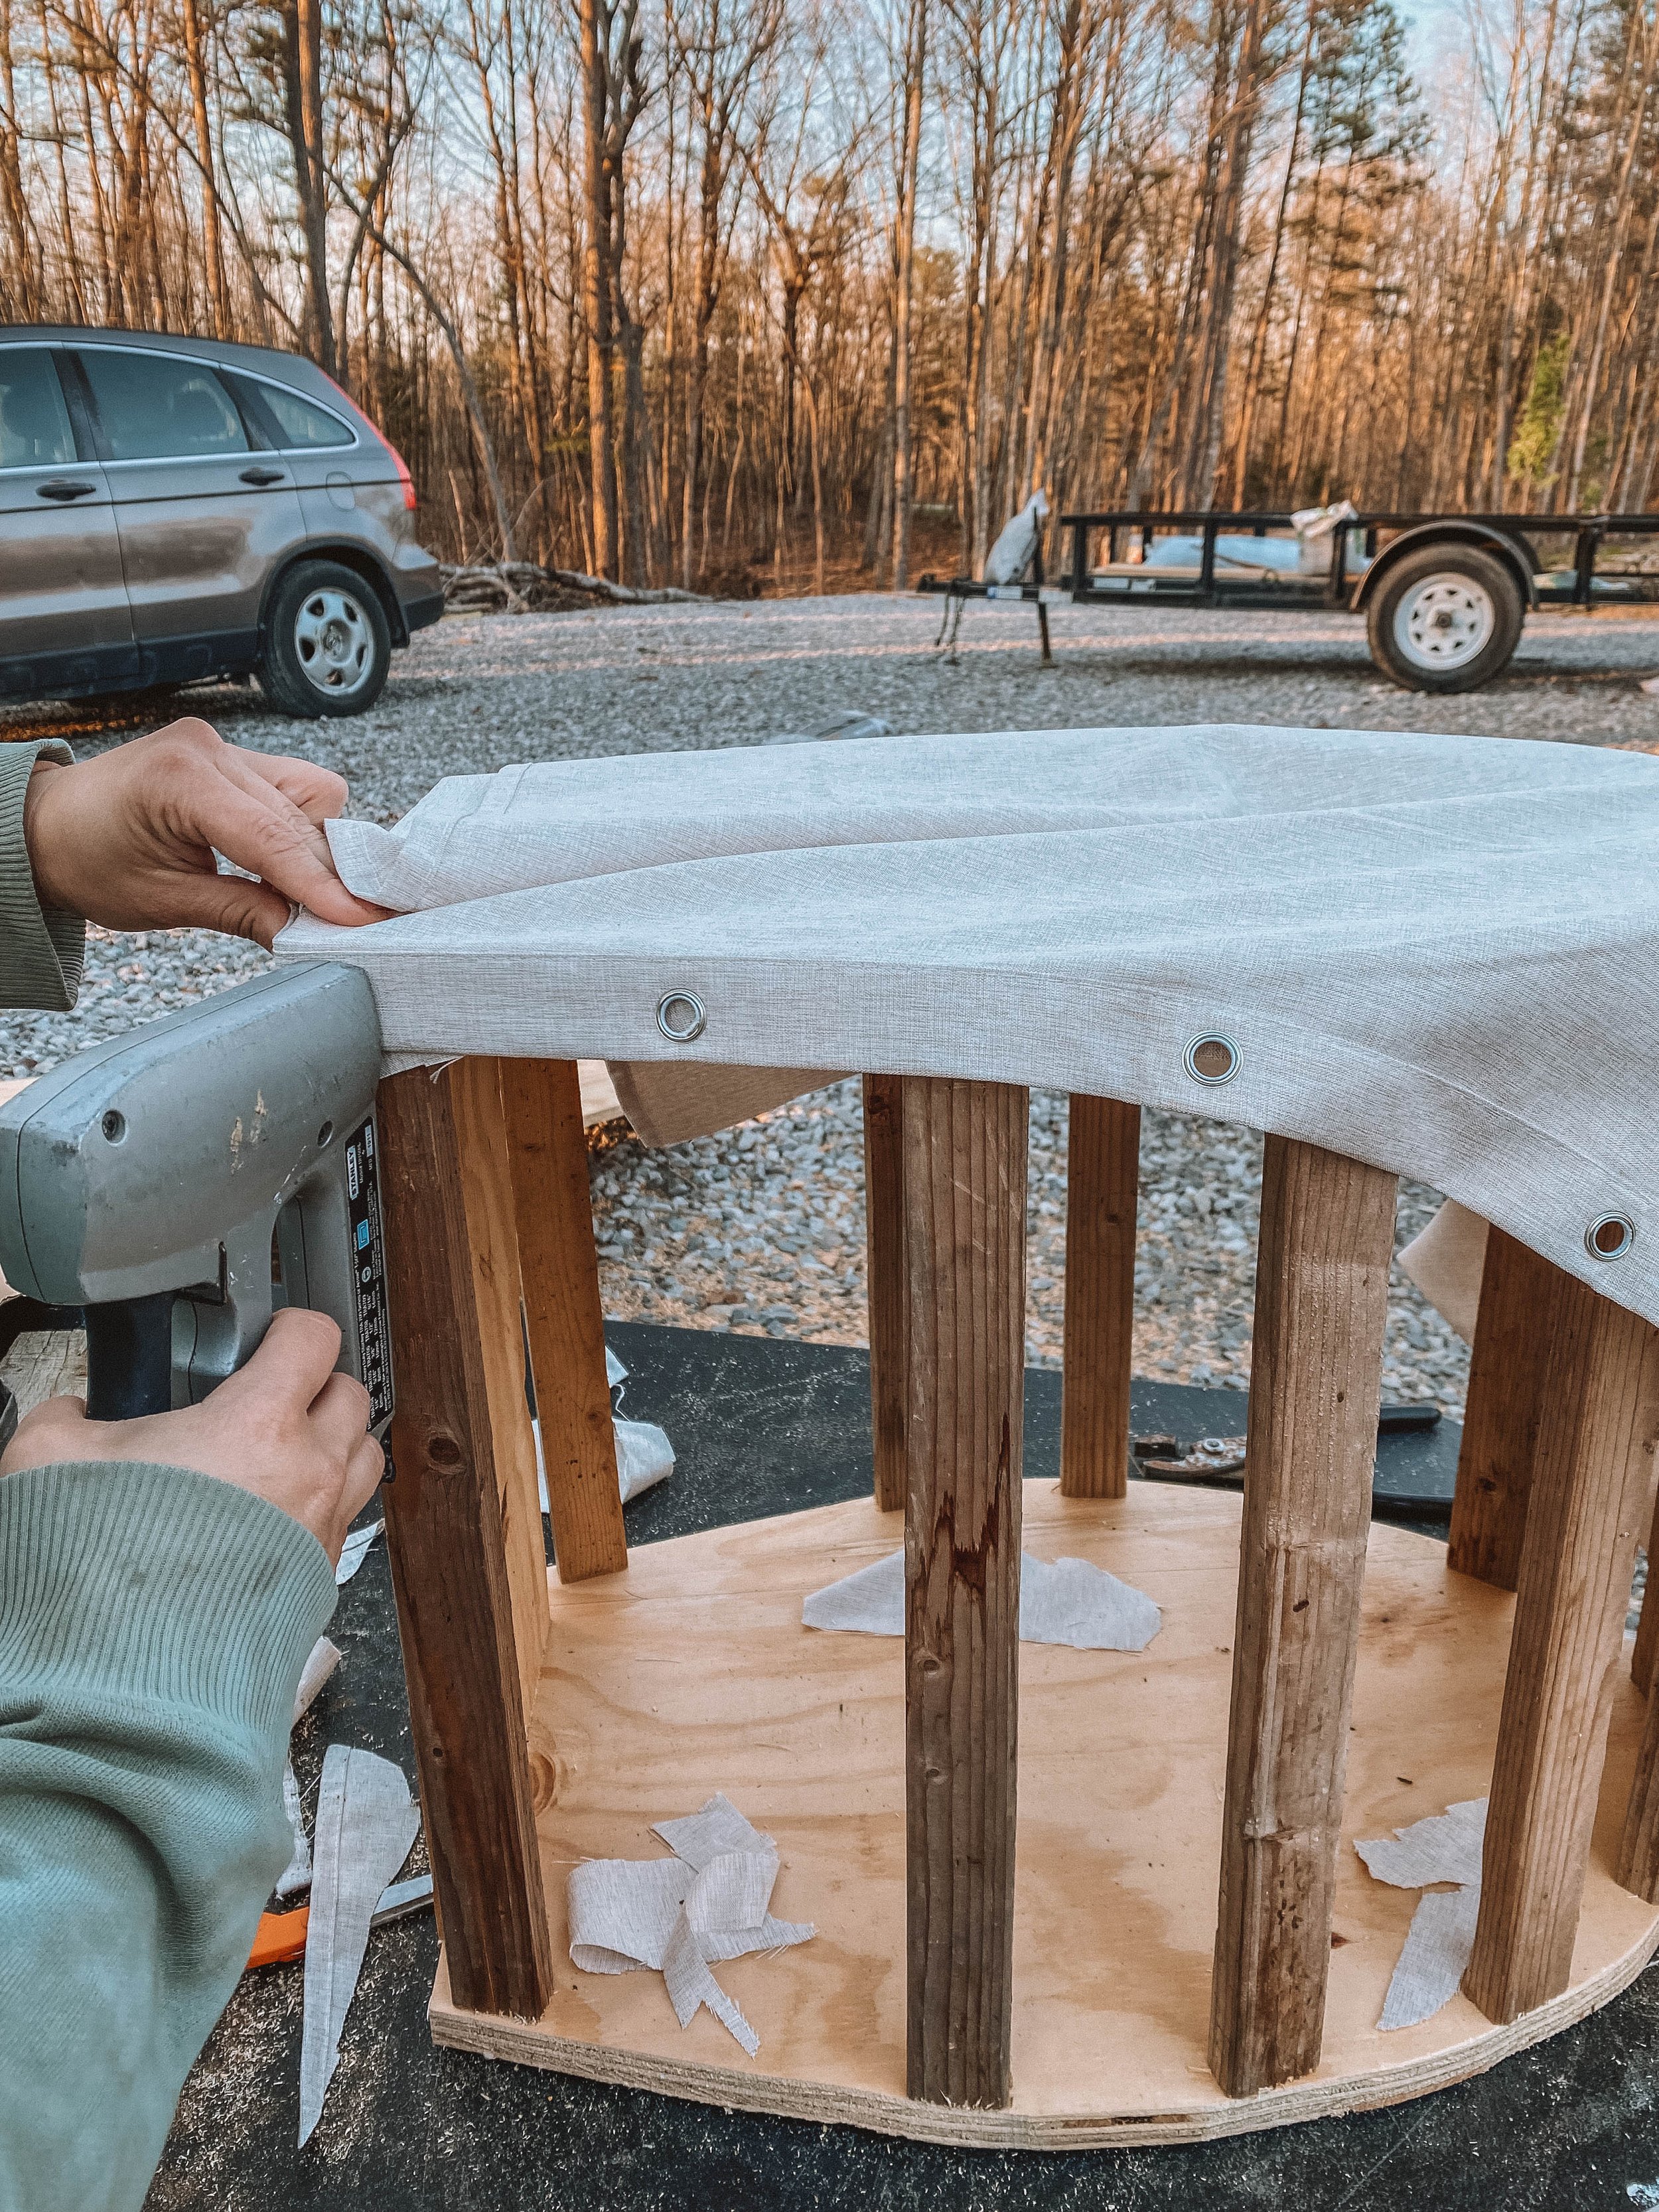
Next, start on the sides. You will do this upside down at first so that after the staples are in you can fold it down.
This creates a hidden seam and looks very neat! Fold the sides over the back and staple neatly. The back isn’t seen so we didn’t even try to hide the staples.

The same goes with the bottom. Put a staple right next to the edge and cut off the excess fabric. No one will ever see this so no need to attempt to hide the staples unless you really want to!

You can do this part with any kind of fabric you want. We chose to use a shower curtain just because they are cheap and water resistant. You could use outdoor fabric or upholstery fabric, or an old sheet. You obviously could do something completely different like sheet metal or thin wood. It is really up to you and how much work, money, and time you want to put into this project. The fabric is easy and forgiving.

Next, attach your toilet seat. You must use an elongated toilet seat for this urine diverter. The installation is as simple as marking where the toilet seat screws should go on the wood, drilling them, and attaching the seat. It’s pretty simple and when you have the toilet seat in hand it’s easier to understand how it attaches.

Pop your solids bucket, urine bottle, and urine diverter in and you are done! Ours is in our outdoor bathroom- don’t forget to check out that project below!

For picture sake there is no bucket in our toilet, but don’t forget to put yours in! This is what it looks like every time you go to use the bathroom. Nothing scary like some people seem to think. The urine diverter just sits in the open hole so it’s extremely easy to remove and clean.
I hope this post makes your project simpler! Please let us know if you have any questions about the toilet in the comments below.


