A Simple DIY Off Grid Solar System

We are in the middle of winter here on the mountain and trying our best to get anything done on our shed to house conversion. The problem is the constant snow and rain is really making that hard. When we do have a window to work, we try to get small projects done. This week we finally set up our really simple solar system. We plan to have a much more robust system in the future, but we have the solar panels so we figured we might as well try to capture some energy whenever we can.
An off-grid solar power system is a system that generates and stores electricity using solar panels and batteries, without being connected to the utility grid. A basic off-grid solar power system would typically include:
Solar panels: These convert sunlight into electricity. The size and number of panels needed will depend on the amount of power you want to generate.
Charge controller: This regulates the flow of electricity from the panels to the batteries, to ensure that the batteries are not overcharged or damaged.
Battery bank: This stores the electricity generated by the panels, so that it can be used when the sun is not shining. The size and type of battery bank will depend on your power needs and usage patterns.
Inverter: This converts the DC electricity stored in the batteries to AC electricity, which is the standard for most household appliances.
Wiring and safety devices: This includes the cables, fuses, and breakers that connect the components of the system together and protect against overloads and short circuits.
It's important to note that an off-grid solar power system requires careful design and sizing to match the specific energy needs of the household or facility. It's also crucial to consider the local regulations, zoning laws and building codes for your area. It's recommended to consult with a solar energy professional before building your off-grid solar power system.
Because we already have a Jackery Solar Generator, we opted to connect our solar panels right to it. The Jackery Solar Generator combines a battery bank, charge controller, and inverter all in one. This makes it much easier to get power quickly whereas a more complicated setup would take way more time and money.
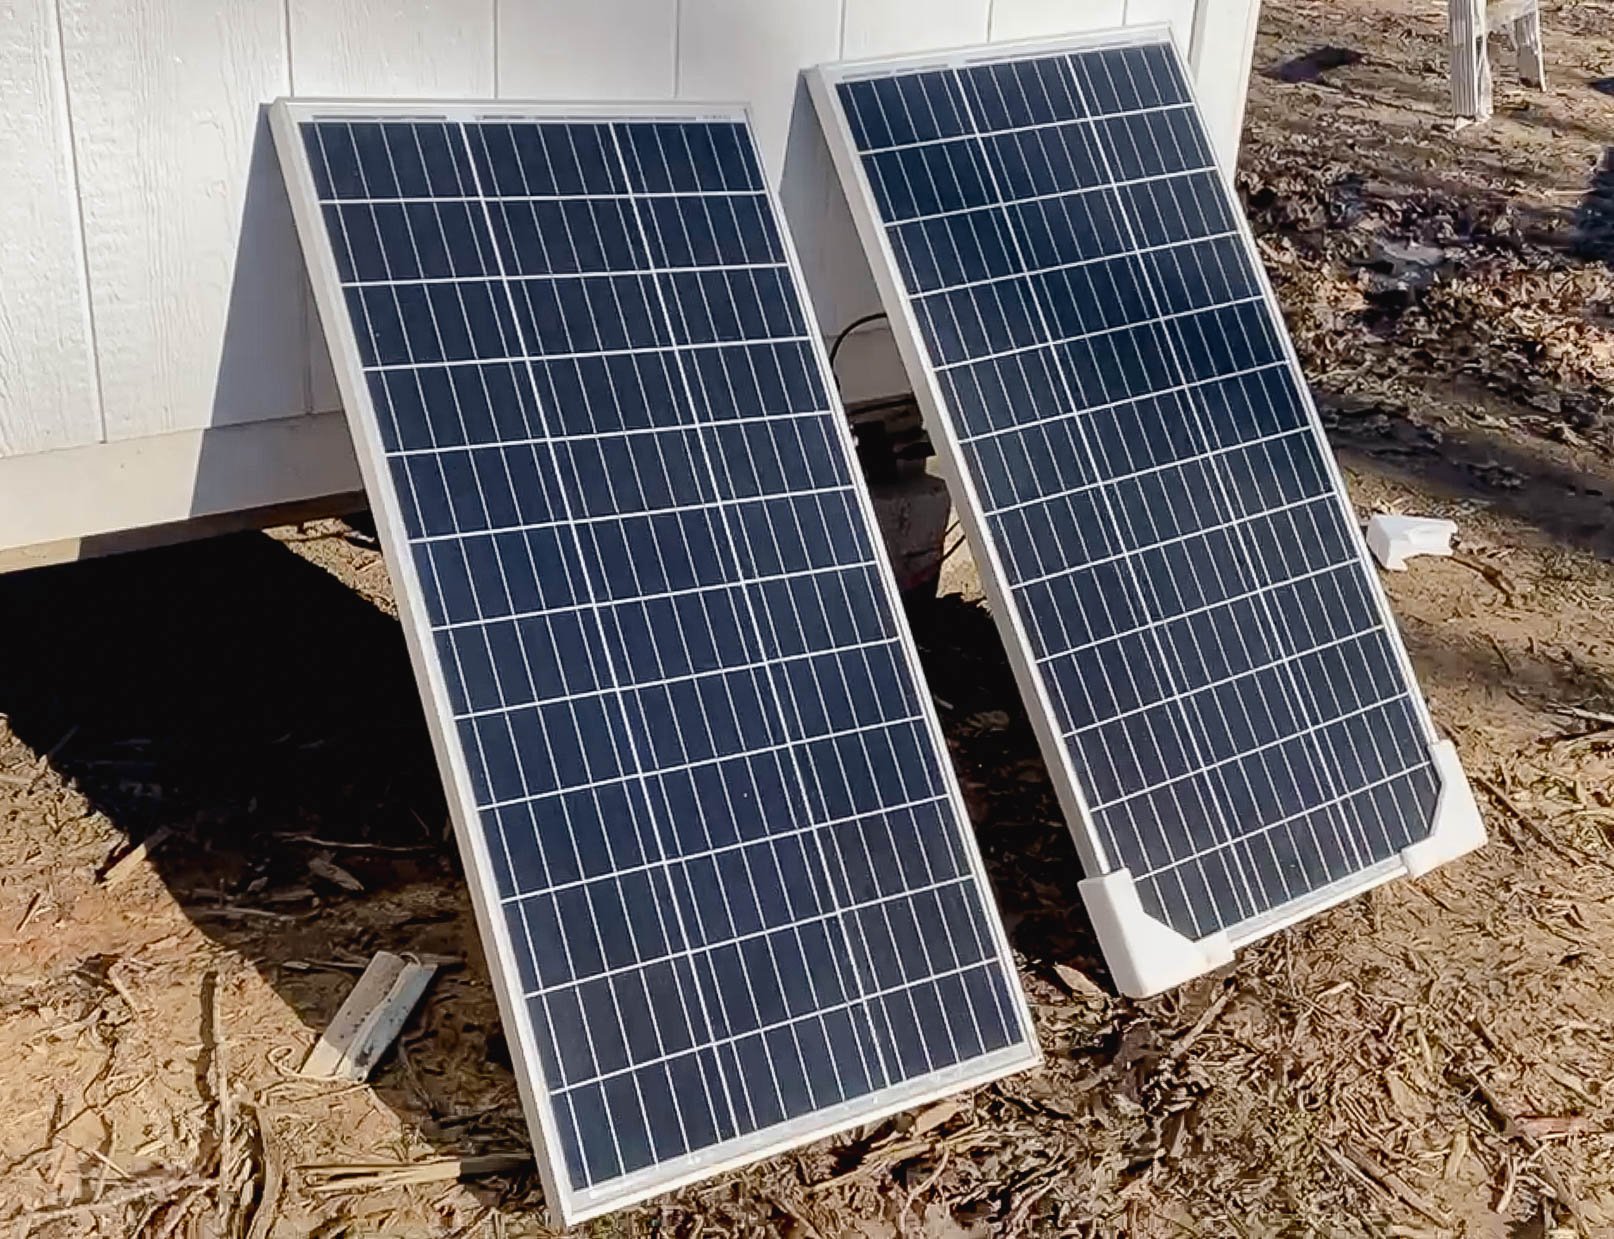
All this to say, we have a Jackery 1000 and two 100W Jackery solar panels to go with it. There are two problems with the Jackery solar panels though. One- they cannot be rained on. I know…. what in the world?? Two- you have to move the Jackery outside right next to wherever you put the panels. Neither of these things make using the Jackery panels easy on a day to day. basis. So we bought some parts and wired up something that would stay plugged in and allow us to always have the Jackery inside the house.
And if you are wondering what all we power with our Jackery 1000, we plug in our mini refrigerator and internet, and charge our phones and computers. It’s the BARE minimum of what we need, but it works for now!
Here is everything we use in this project:
Solar Generator (We used the Jackery 1000)
With all of these things, we are basically building what Jackery already sells when you buy their solar panels. However, this project will allow your solar panels to be rained on and extend how far apart the solar generator and solar panels need to be to each other.
Step 1. Figure out where your solar panels are going. For us they went right on the other side of the wall where the Jackery was in the house. This worked because it’s right where the sun shines throughout the day. If you place yours further away, you will need to measure the distance. The solar extension cable will need to be long enough to reach both places.

Step 2. Drill a hole through the wall where your wires will go. We used a drill bit that was just big enough for one wire to fit through and then drilled 2 holes side by side.

Step 3. Install the entry gland. Put the solar extension cable through entry gland and then through the holes. My entry gland didn’t have any holes so I had to drill a couple to attach it to the side of the house. I put a bead of silicone around the inside edge of the entry gland and then pressed it against the house. Then I screwed it to the house through the holes I drilled. Don’t tighten the pieces on the entry gland yet.

Step 4. Connect the solar panels. Attach the Y connectors to the solar panels by connecting the two positives together and the two negatives together. Then connect the last spot on the Y connectors to the solar extension cable. Feed any loose wire on the extension cable through the entry gland to the inside. Now you can tighten the entry gland pieces over the wires.

Step 5. Install the mc4 connectors on the ends of the wire inside. If you have excess of wire inside, you can cut it to make it more manageable. We had excess but just rolled it up nicely in case we decided to move the solar generator further away. Install the mc4 connectors by using the instructions that came in the package. This is where the crimping tool comes in. If you don’t have this, it is possible to crimp with needle nose pliers (search YouTube for instructions). However, the tools makes it MUCH easier. But I used needle nose pliers and it worked.

Step 6. Connect the extension cable to the solar to DC cable. Click to mc4 connector ends together, female to male and male to female.
You are now ready to plug your 2 solar panels into the Jackery! It is unfortunate that Jackery solar generators don’t allow you to plug in more than 200W of power at a time. While this simple system has definitely served us well, it does have it’s limitations. It is definitely a great way to start producing solar power on a small scale. If you don’t plan on having anything like an air conditioner or large refrigerator, this could possibly be enough for you. But for us, it’s just a start to meet our most basic power needs
We will be working with Battle Born Batteries on our bigger power setup soon, so stay tuned to see what we use and how we set it all up!
- Savannah