How We Built An Off Grid Outdoor Bathroom That is Functional & Beautiful

After 2+ years of living on our land, our off grid bathroom is FINALLY complete! But boy what a journey our bathrooms have been over the past two years. It all started when our tarp shower shredded in the windy season. At that moment I finally decided nothing else was more important than setting up something more permanent for showering.

This bathroom project grew as I went along. At first it was only supposed to be a shower, but once I started building, I just couldn’t stop imagining how nice it would be for our toilet and shower to be in the same place. And then I thought, “why stop there??” I wanted a sink too so we could wash our hands right in the bathroom, instead of in the house or at an IBC tote. Then I realized that since our shower heater would be in the bathroom, the sink could also be heated. And so the project began…


Materials
Our previous tarp shower had a small platform inside that I built so we wouldn’t be showering while standing in the mud. I decided I would take the frame of that platform and build walls around it. We had a pile of scraps from when we had our wood milled and I knew I wanted to utilize this pieces. There is still to this day a HUGE pile of these pieces by our driveway and I am determined to put all of them to use. This bathroom helped!
Eventually I did have to buy new deck boards and roofing materials. The footprint of the entire bathhouse is about 7’ x 8’ so the supplies only came to about $200 at the time. We already had our propane water heater because we had a shower set up previously. The heater comes with a shower head and the connection for your propane tank, but we decided to get a sleek black shower head.

This was such an individualized build, but I know people want to know how and with what we built this. As best as I can describe and remember, here are all the things we used in this build:
Deck boards
Clear plastic roof
7- 8’ tree logs (About 4” - 6” in diameter)
Treated 2x4s
Treated 1x4s
2- Treated 2’ x 6’ x 8’
Rough cut wood planks
Tons of outdoor wood screws

Design
If you haven’t followed us for long, you probably don’t this about us… but we love decorating our spaces and designing beautiful places. Our first year and a half off grid was the exact opposite of decorating a beautiful room. So when we finally built this bathroom, we realized we finally had something permanent and complete that we could put our Hey Wanderer touch on. Since the bathroom was going to be created out of very raw materials, we instantly knew we wanted to make the inside look like you are at some luxurious yet rustic retreat in Tulum, Mexico.

Tulum is one of our favorite places on earth and we have be so inspired by the decor there. We’ve incorporated Tulum-esque decor and DIYs in many of our previous spaces and we were so happy to bring it to our new outdoor bath house. Our goal in the future is to do more landscaping around the pool and bath house area and add pathways to connect the house and outdoor kitchen to the other spaces. We hope it will have a jungle vibe in the woods.

If you are interested in learning about Tulum or are planning to visit, check out our resources on our blog, Hey Wanderer.

The build
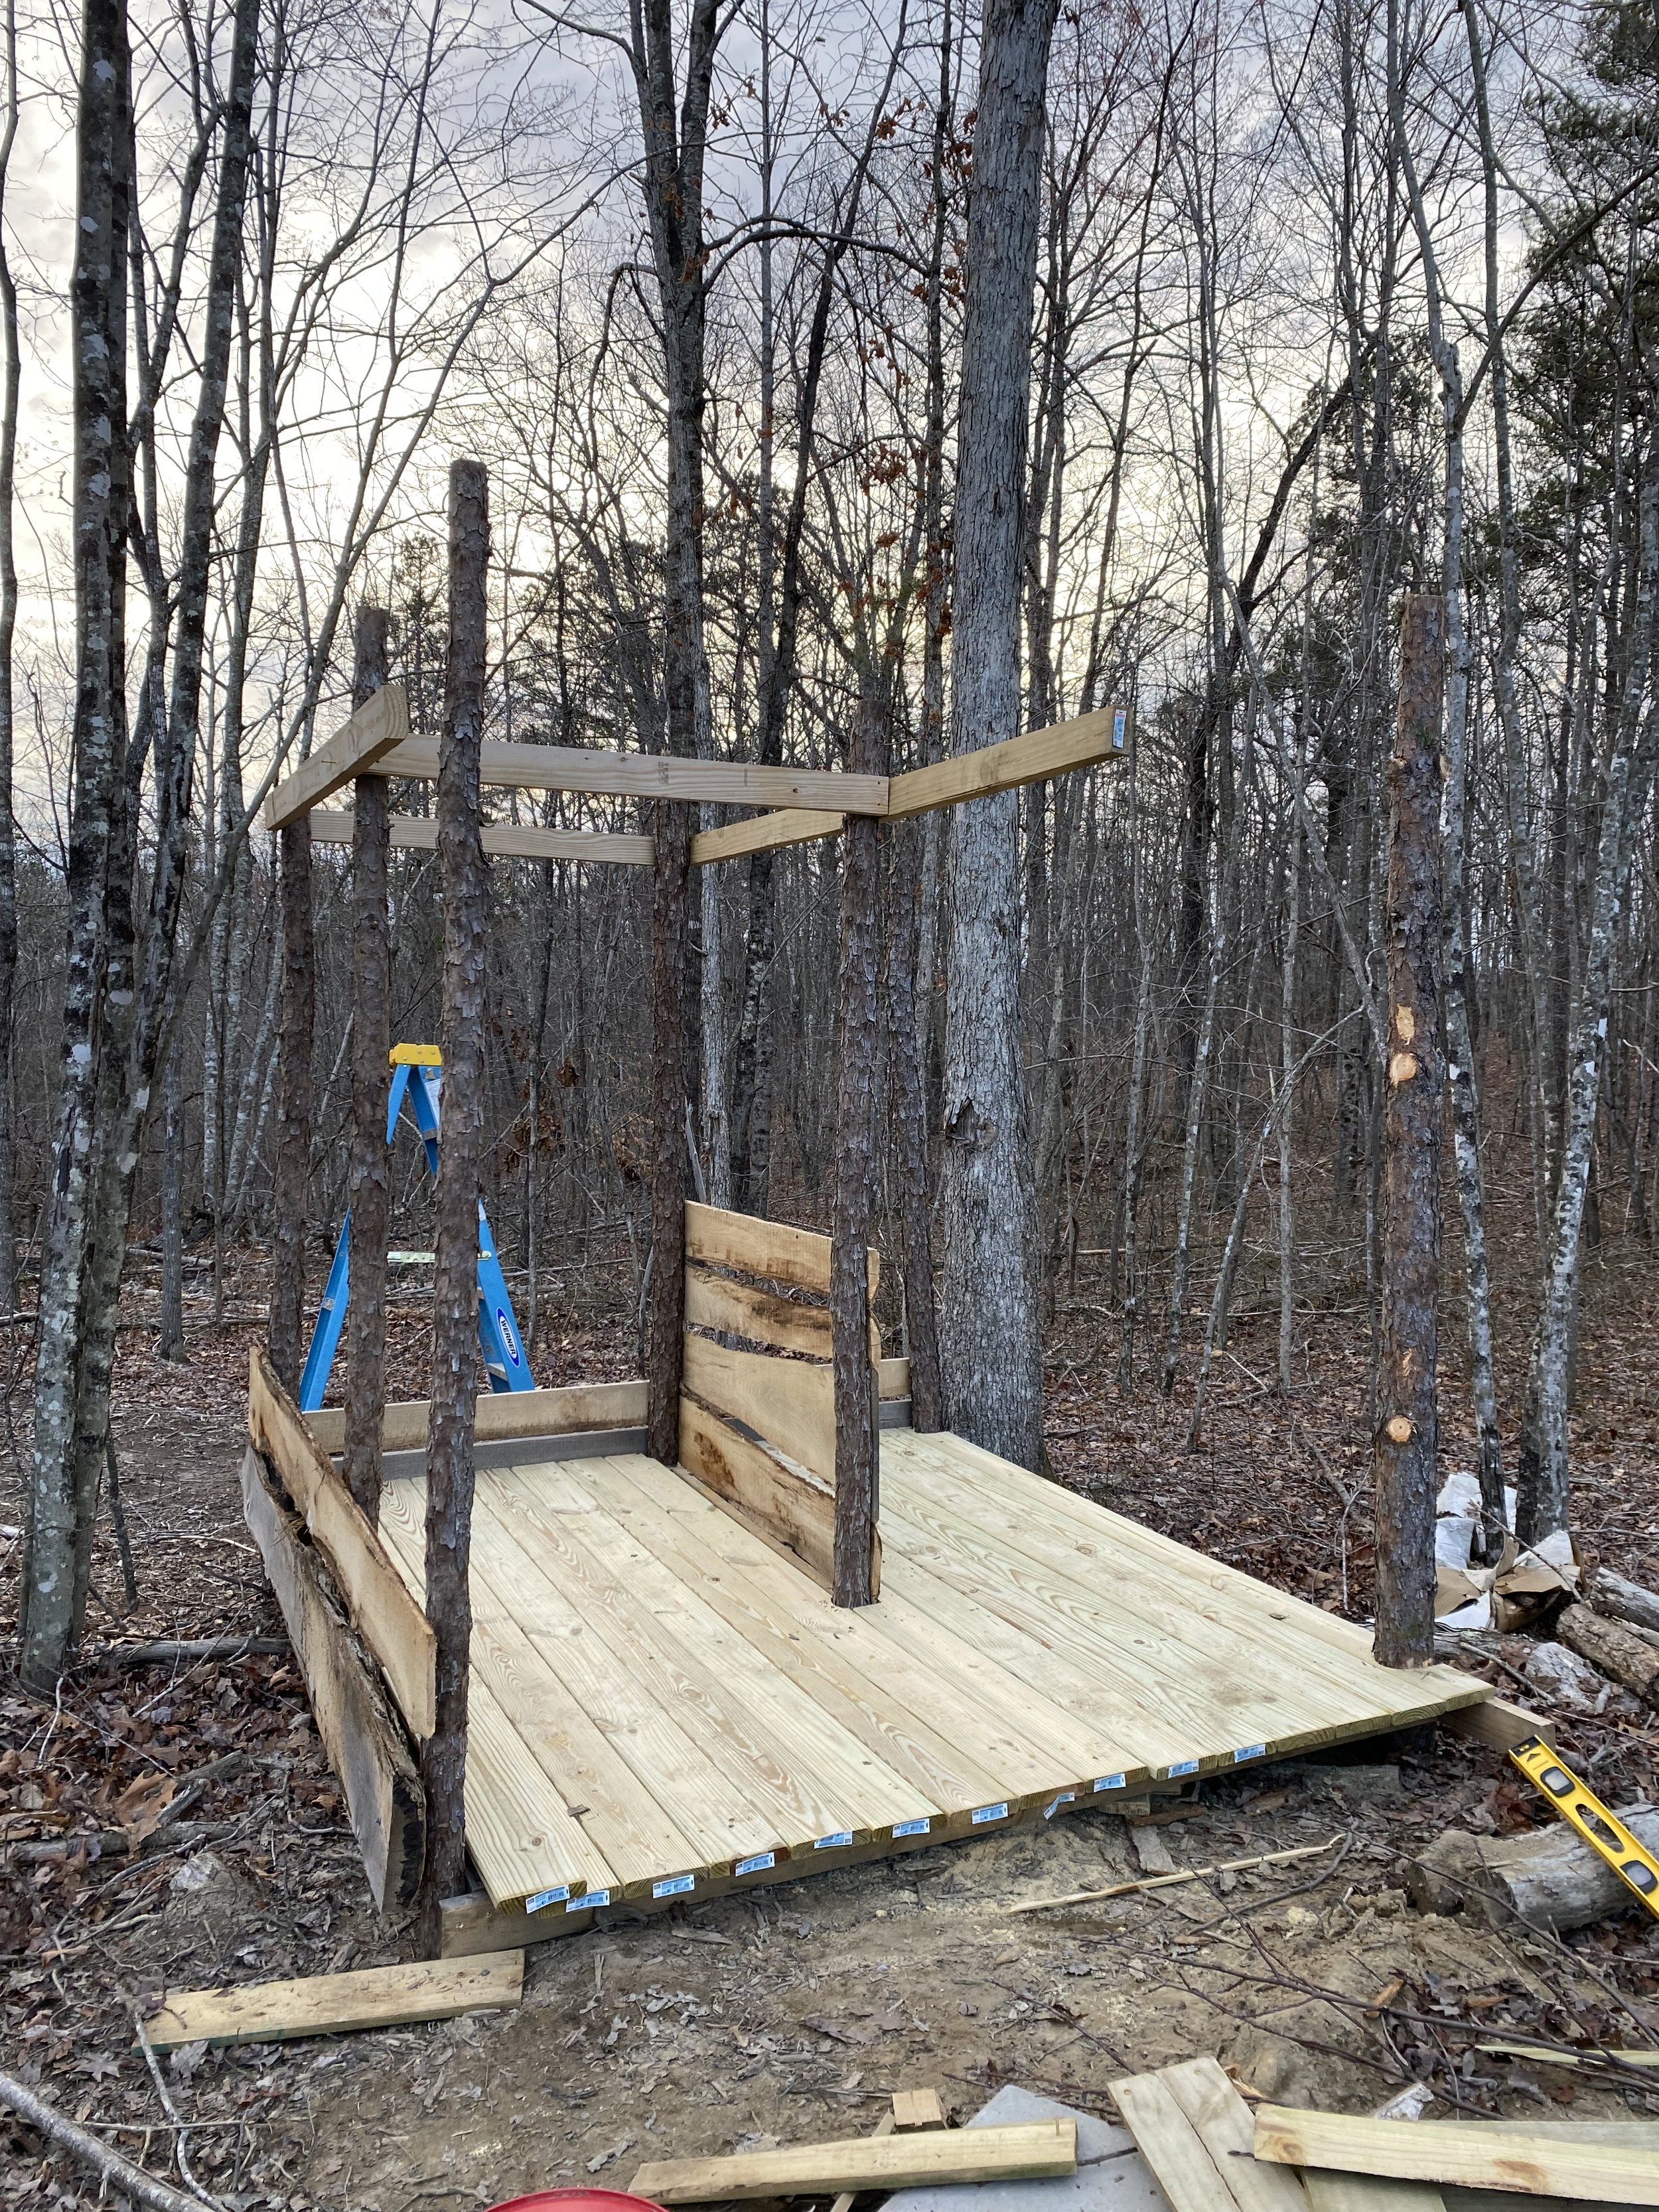
To start, I framed the floor. I did all of this with scrap wood we had around the land. When we left our home, we brought all of our old DIY projects with us. We had bed frames that we took apart and different things outside that we knew we might like to use one day. I’m so glad we did that, although at the time I hated moving it all! The section with the deck boards is the original section from our previous shower. And if you are wondering why all the pieces aren’t exactly the same size and the same spacing, it’s because we were using what we had and we didn’t have a lot of full length pieces of wood. This bath house was all about making do, but also trying to make amazing things happen without much.
As you can see the corners of the walls are trees. Most of these had fallen in severe weather and we decided they could have new life in our bath house. Now some of you may be worried about these and how we didn’t de-bark them, but don’t worry! We plan on treating all the wood to keep away boring insects AND we aren’t that worried about how long this bath house will last. We of course want it to last as long as possible, but if it doesn’t stand the test of time, we are okay with that. We have the skills to repair when necessary and we will!
The first thing we spent money on were the deck boards. Originally we were going to use different scraps we had already, but most of them were too small and it wasn’t going to work out. So we bought 15 deck boards to cover the whole floor. I'm very glad we did this because the floor is extremely sturdy and level and it hides how DIYed this bathroom really is.

These are all the scrap pieces I was telling you about. They are what is making up the walls. On the exterior walls we put two layers so you can’t actually see through the cracks. A lot of people on social media are constantly worried about people peeping through the cracks and bugs getting in. One, this is an outdoor bathroom so bugs are a given. We try to mind our own business and only take care of the bugs that can harm us, like wasps trying to build their nest in here. Two, we live VERY far away from most people who would just be sneaking onto our land. Again, not something we are worried about.
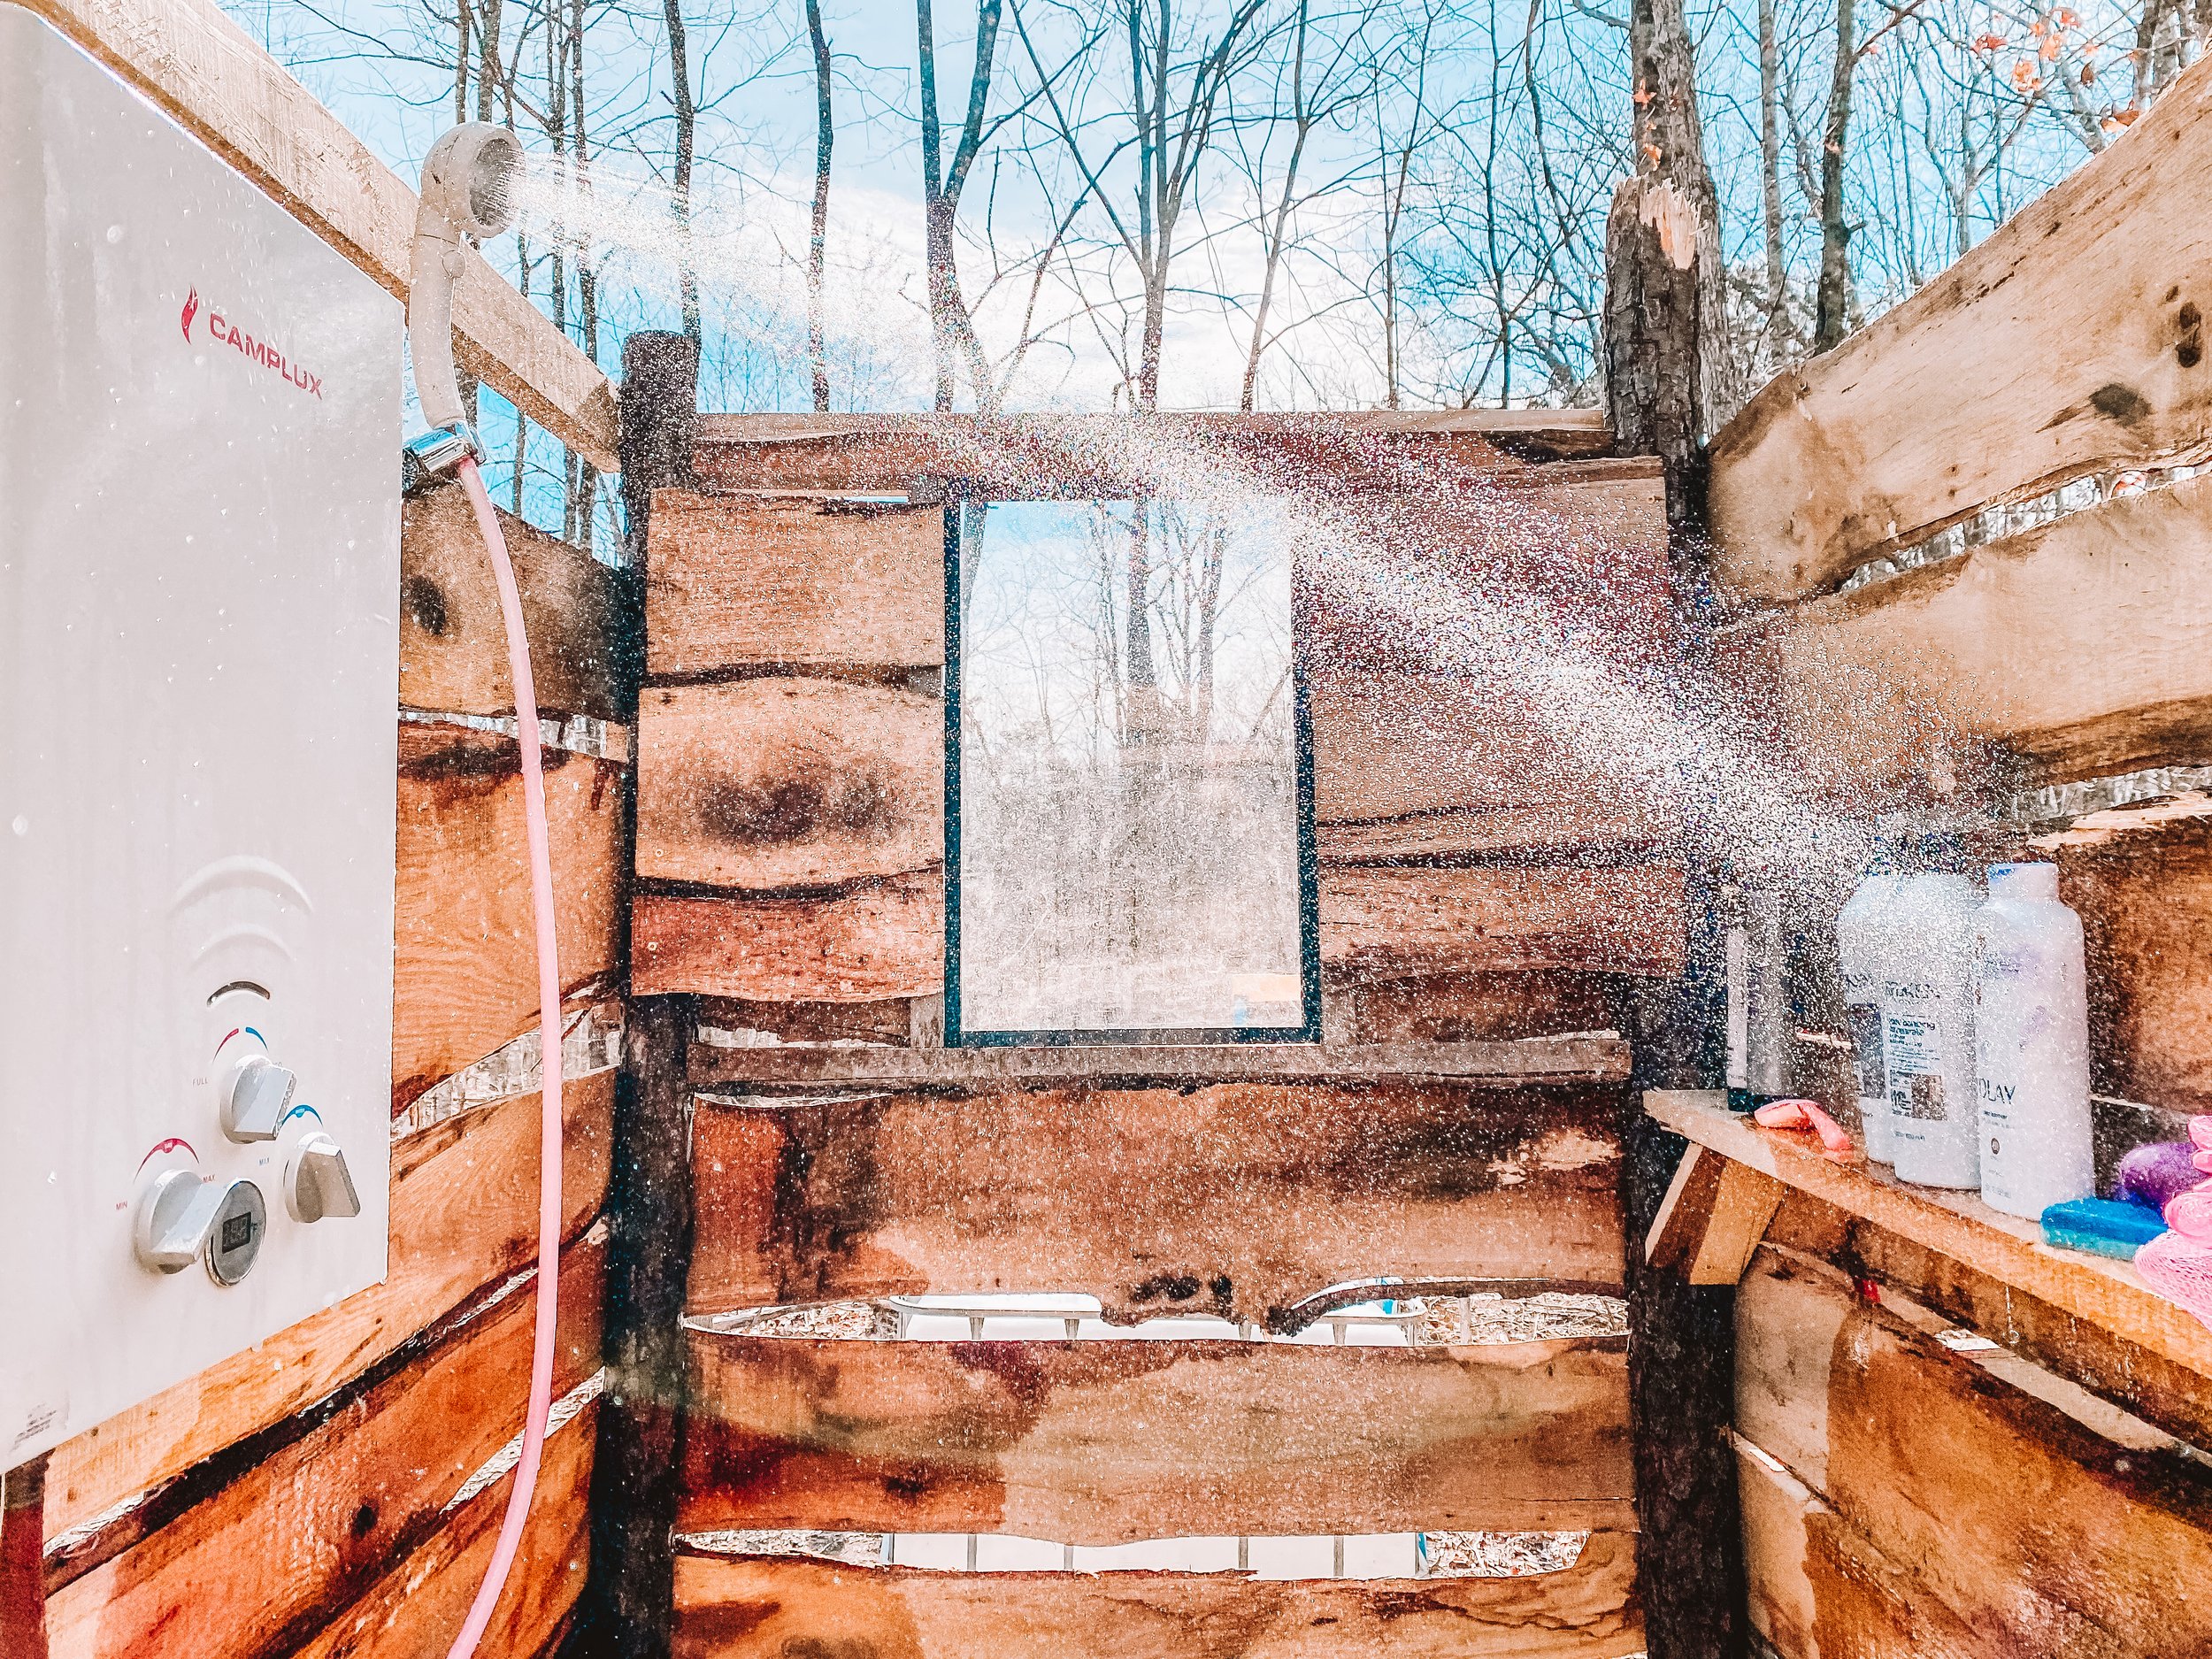
I made the window out of some scrap wood and leftover plexiglass we had. We wanted to be able to see out into the woods when showering. But rest assured, even if there was someone behind the bath house, they couldn’t see you naked through the window. We strategically placed it at eye level and the bath house is pretty high off the ground in the back. You’d have to be about 7 ft. tall to see in from the outside. We started using the shower as soon as enough walls were up. We didn’t even have a door at this point, but we needed our showers!
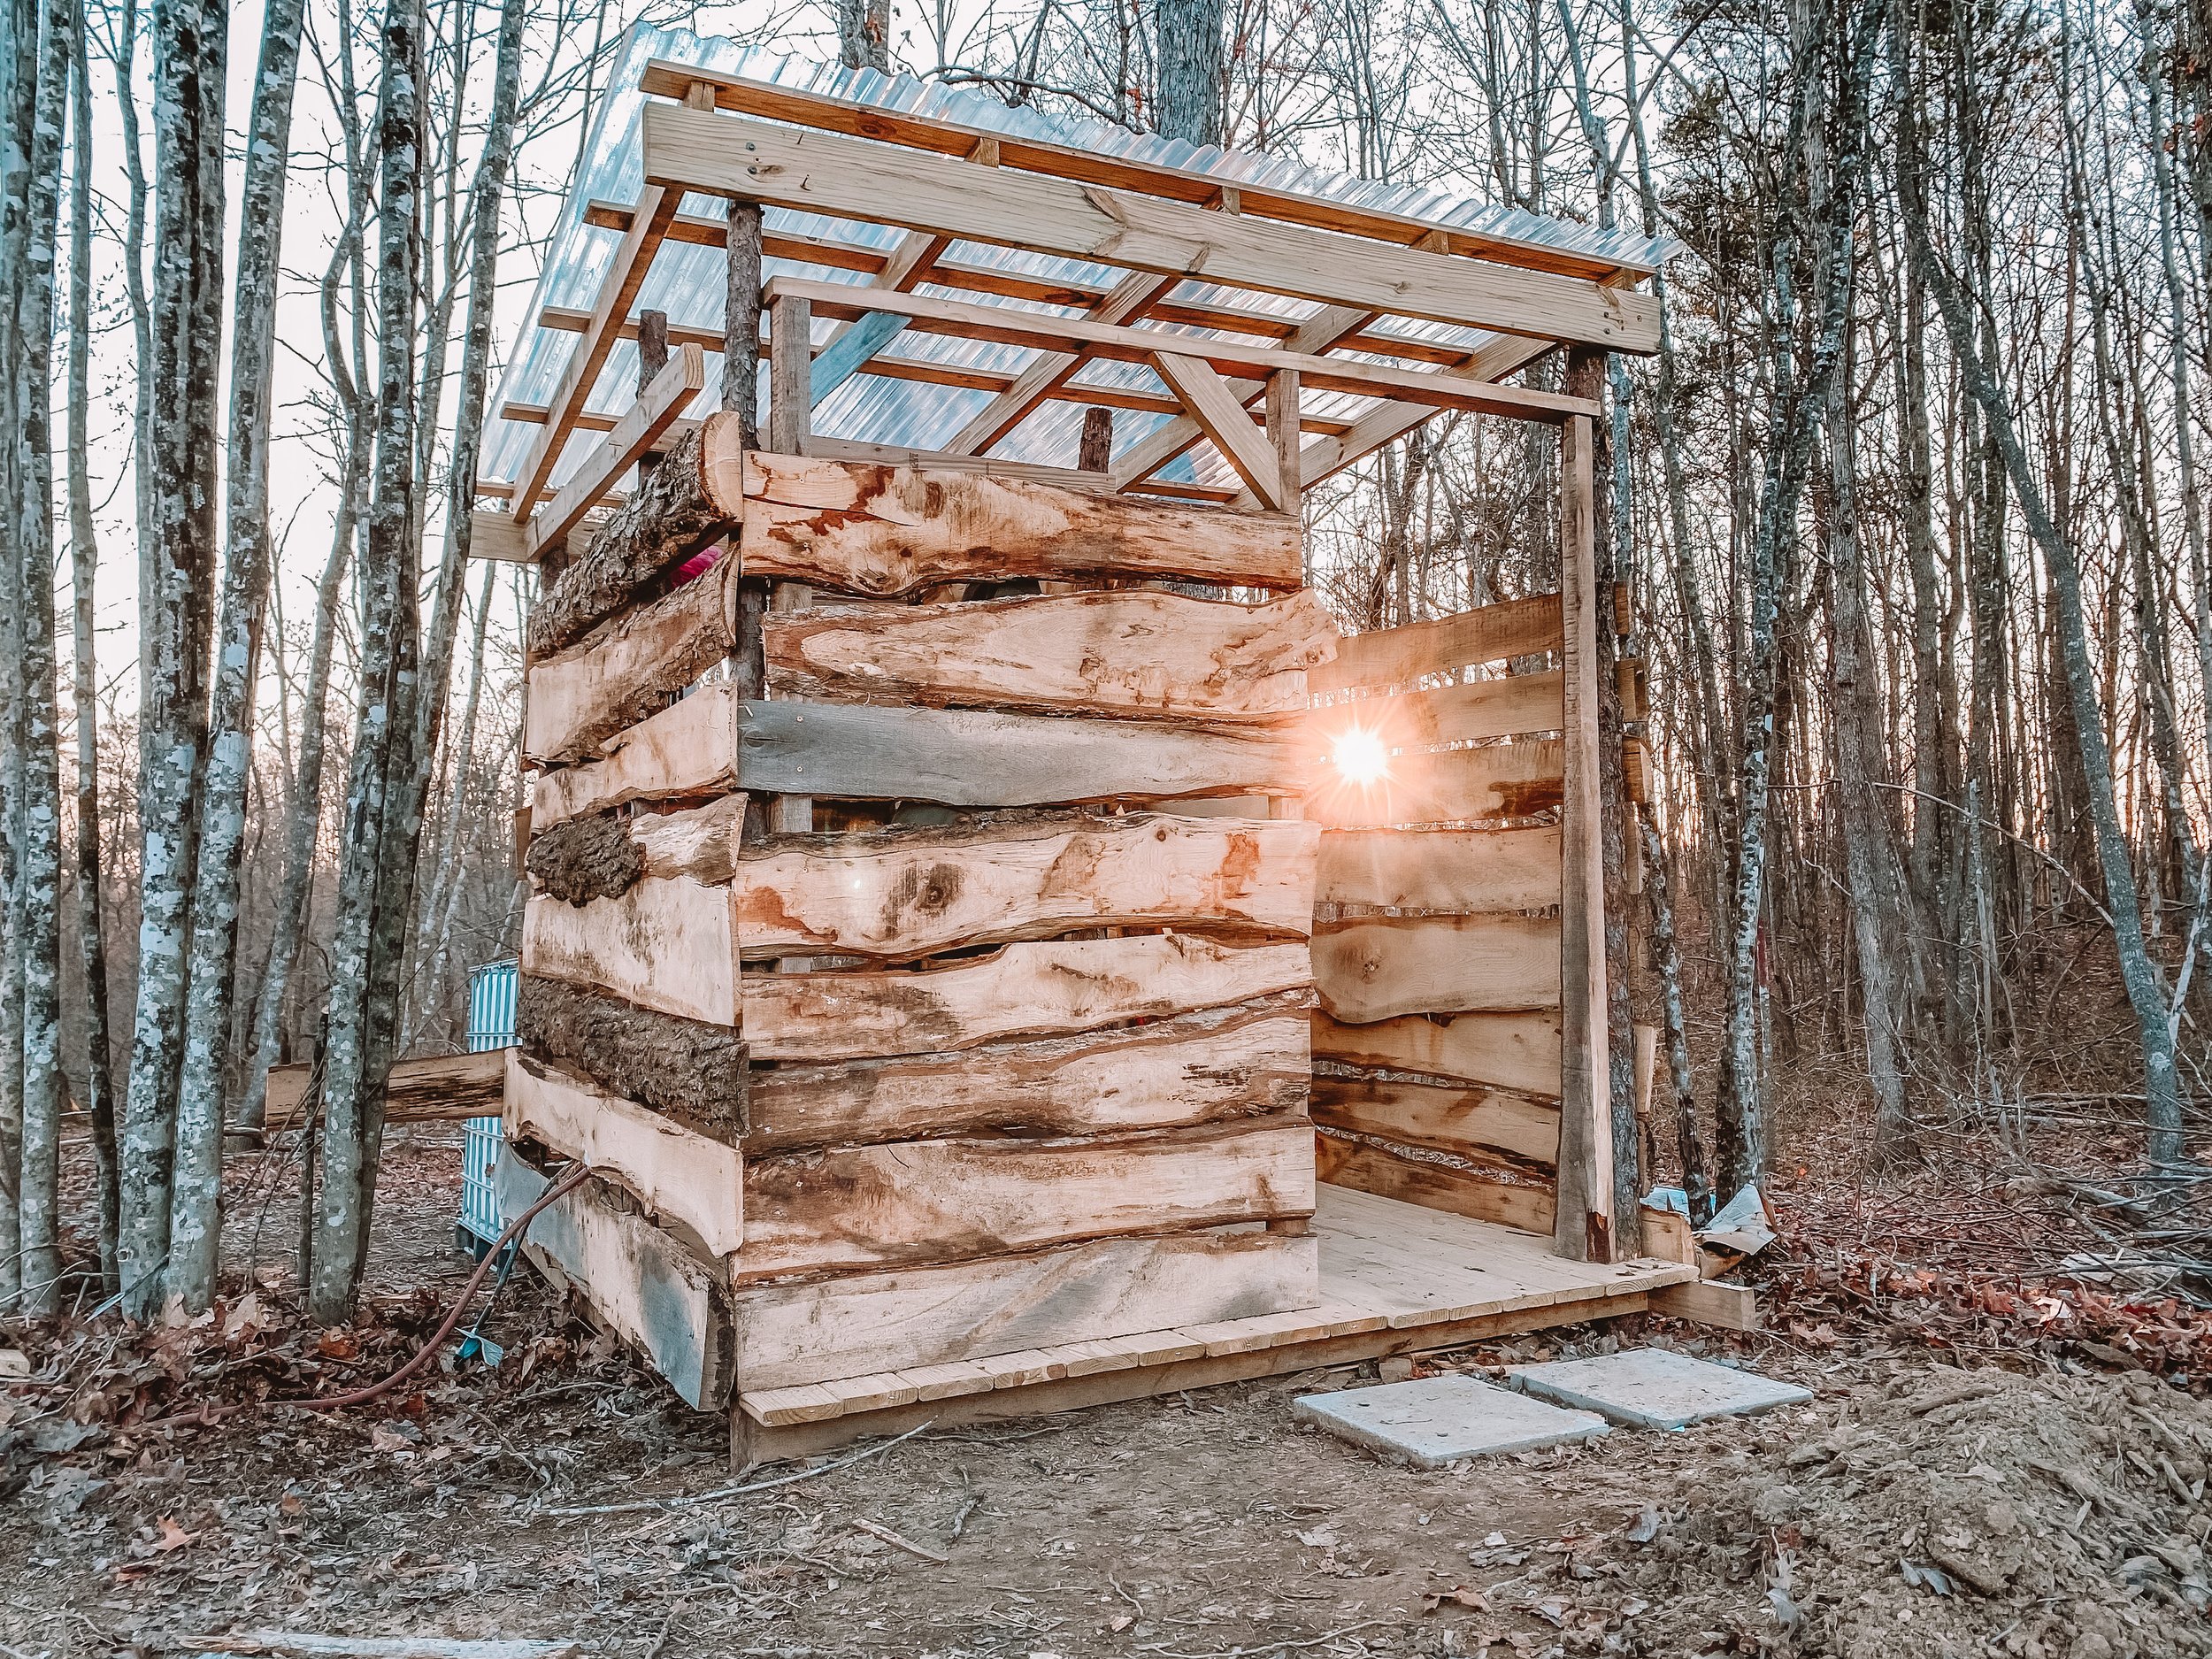
Here’s where the walls really started to take shape. We also put the roof on before finishing the walls as you can see. This is the second thing we bought new materials for. Originally I thought I would be using this roof metal that we got at the dump, but after I enlarged how big the bathroom would be, we realized it wouldn’t be enough material. We decided to go with a clear roof to let it feel more open and to see the trees above. It’s great because in the winter it allows some sun in for warmth, but in the summer, the trees next to it provide shade from the hot sun. Works out pretty well!

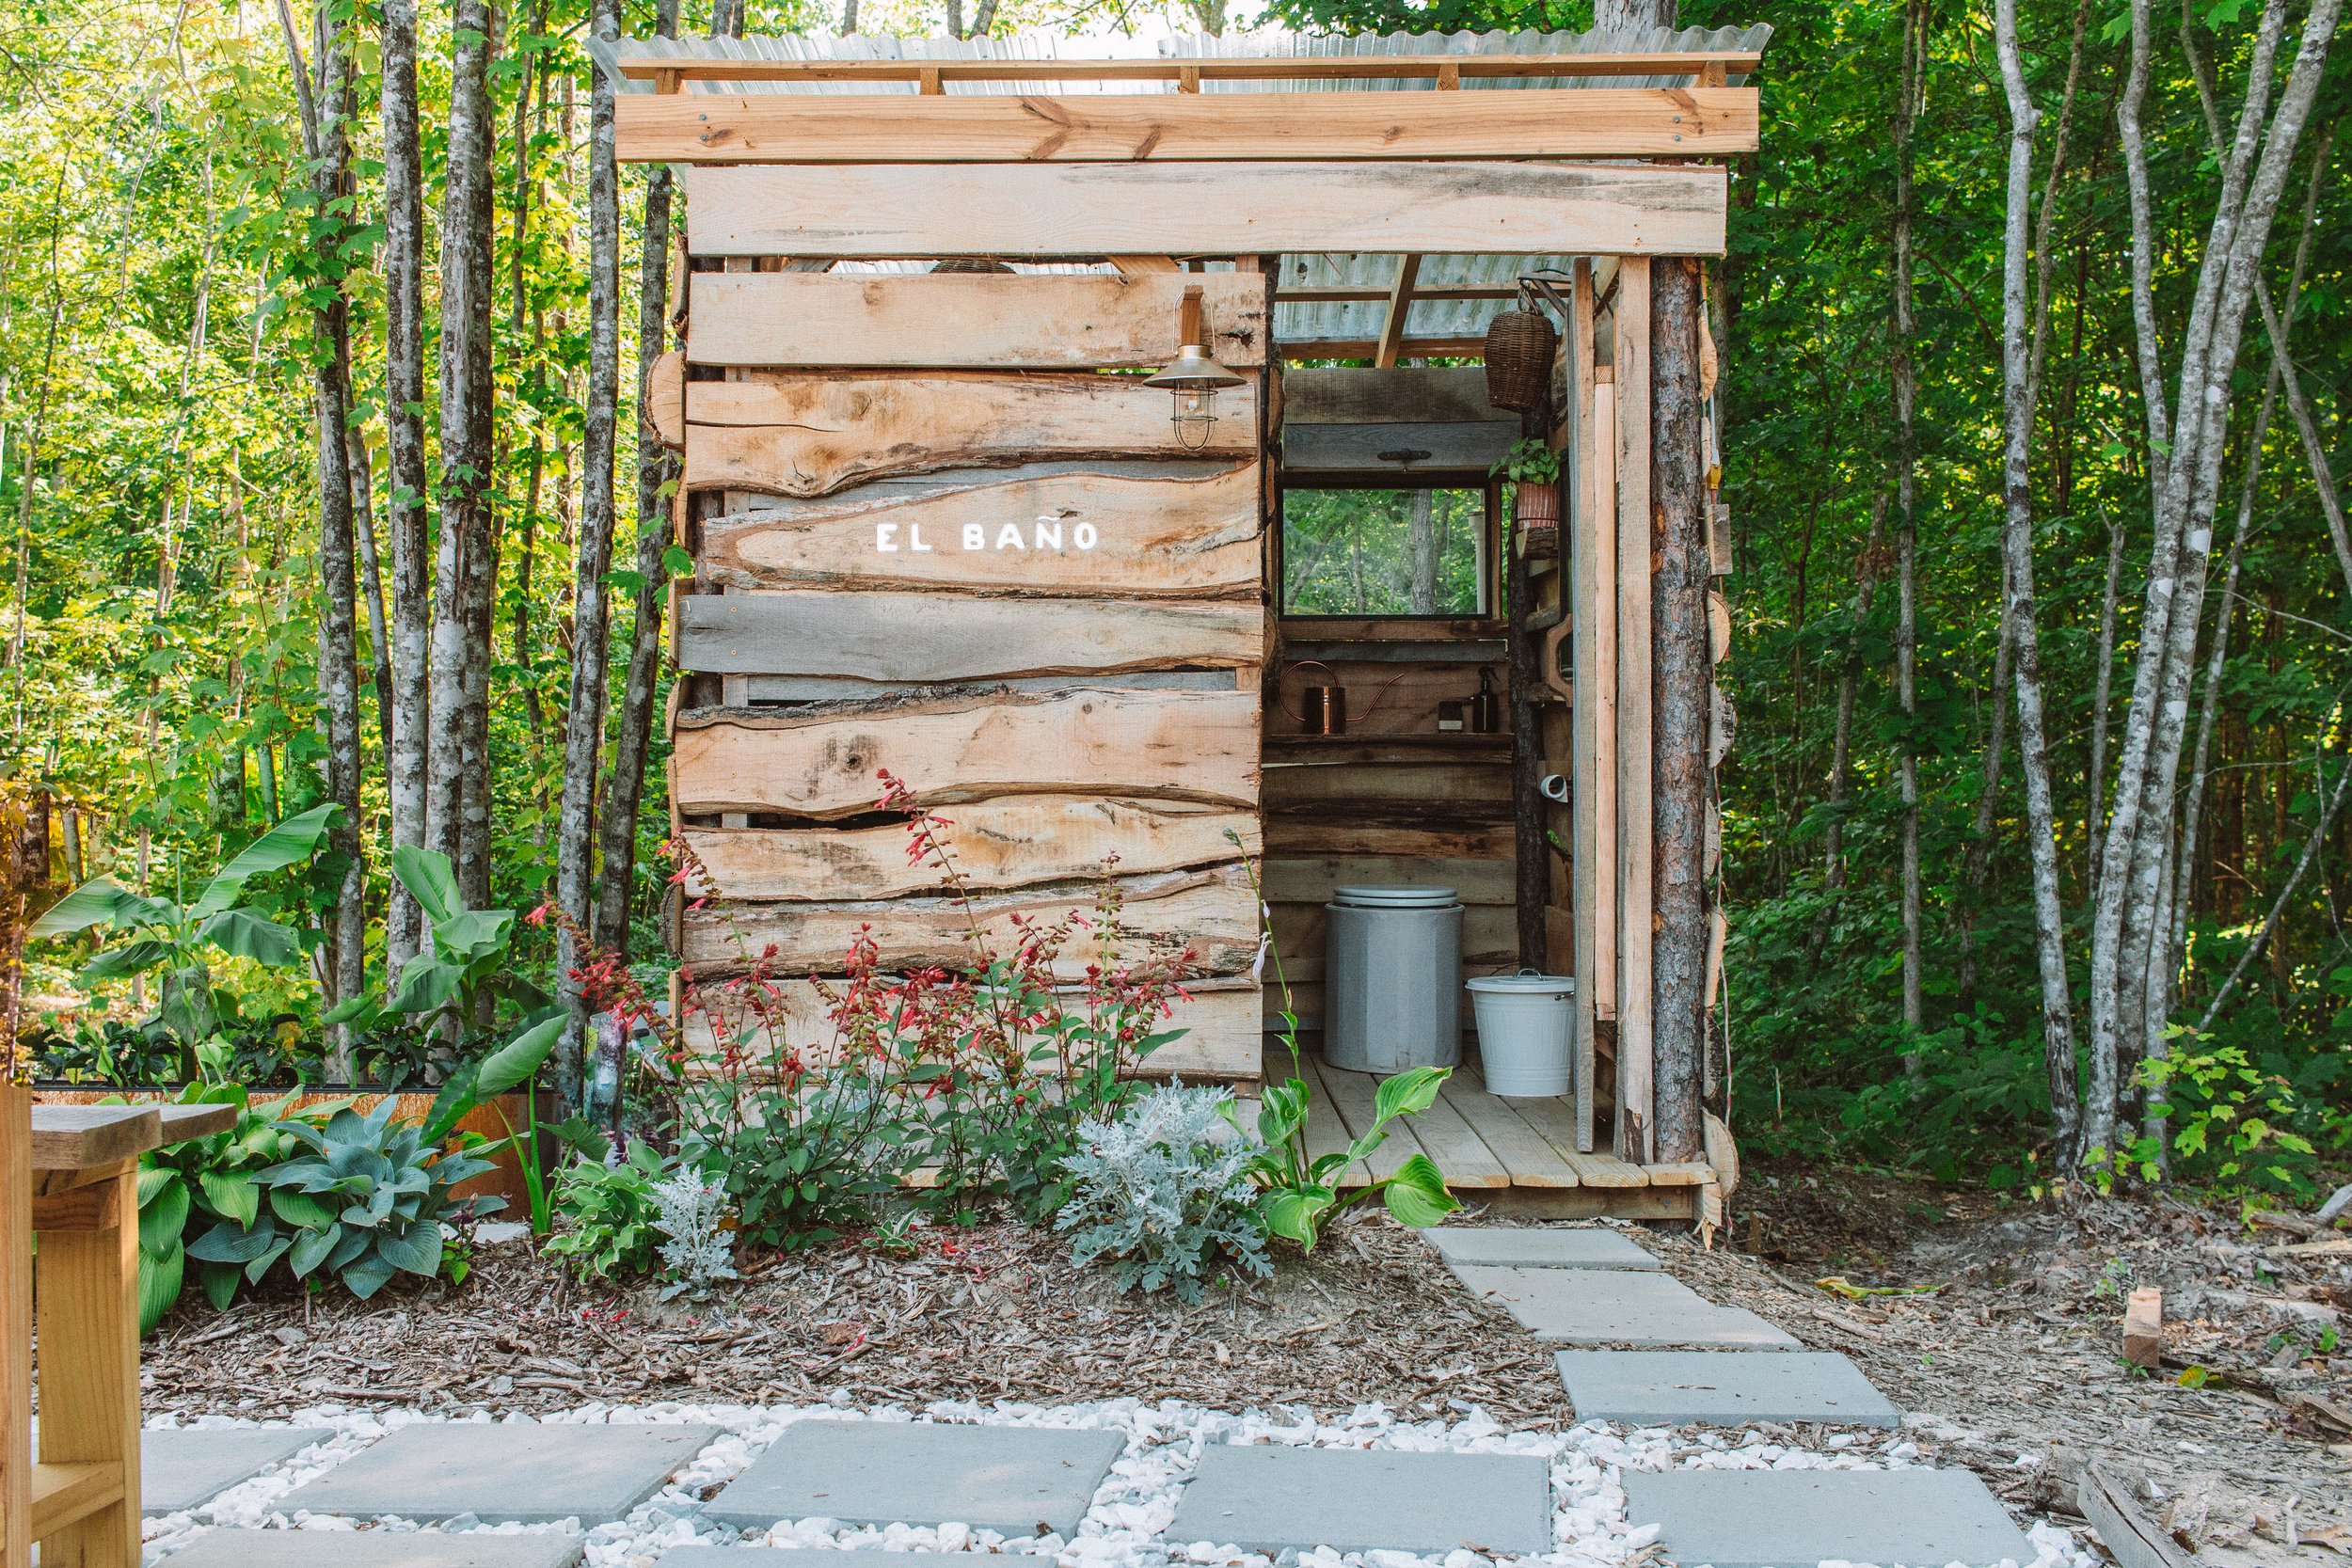
We made the door out of our milled wood and the handle came off of a very very old wood trowel that we found for cheap at an antique store. We painted El Baño on the outside as a nod to Tulum and my hispanic heritage. I found a font online that was similar to one used on old signs in Mexico and I hand painted it on the front. From the beginning I knew I wanted to have a sign on the bath house, so this worked out great. Also, the lantern is solar powered and gives just enough light at night to show you where the bath house is.

SYSTEMS
We already had built our composting toilet using our Throne urine diverter. But it used to be pink so we decided to recover it. We used a shower curtain both times because it’s already a sort of liquid resistant fabric. Learn more on how you can make one too below.

We dug a gray water system in the back and this is where the urine diverts to. The solids go into a bucket and are covered with wood shavings. It’s a very simple, yet effective system. If you want to know more about composting toilets and how they work, check out this post.

The roof collects rainwater and the water is stored in an IBC tote in the back.

The water then is pumped into the water heater and then into the shower head and sink. We used pex pipe for most of the water lines and they are hidden between the walls for the most part. Our heater uses propane to heat so the tank sits on the outside, but the heater is accessible inside.
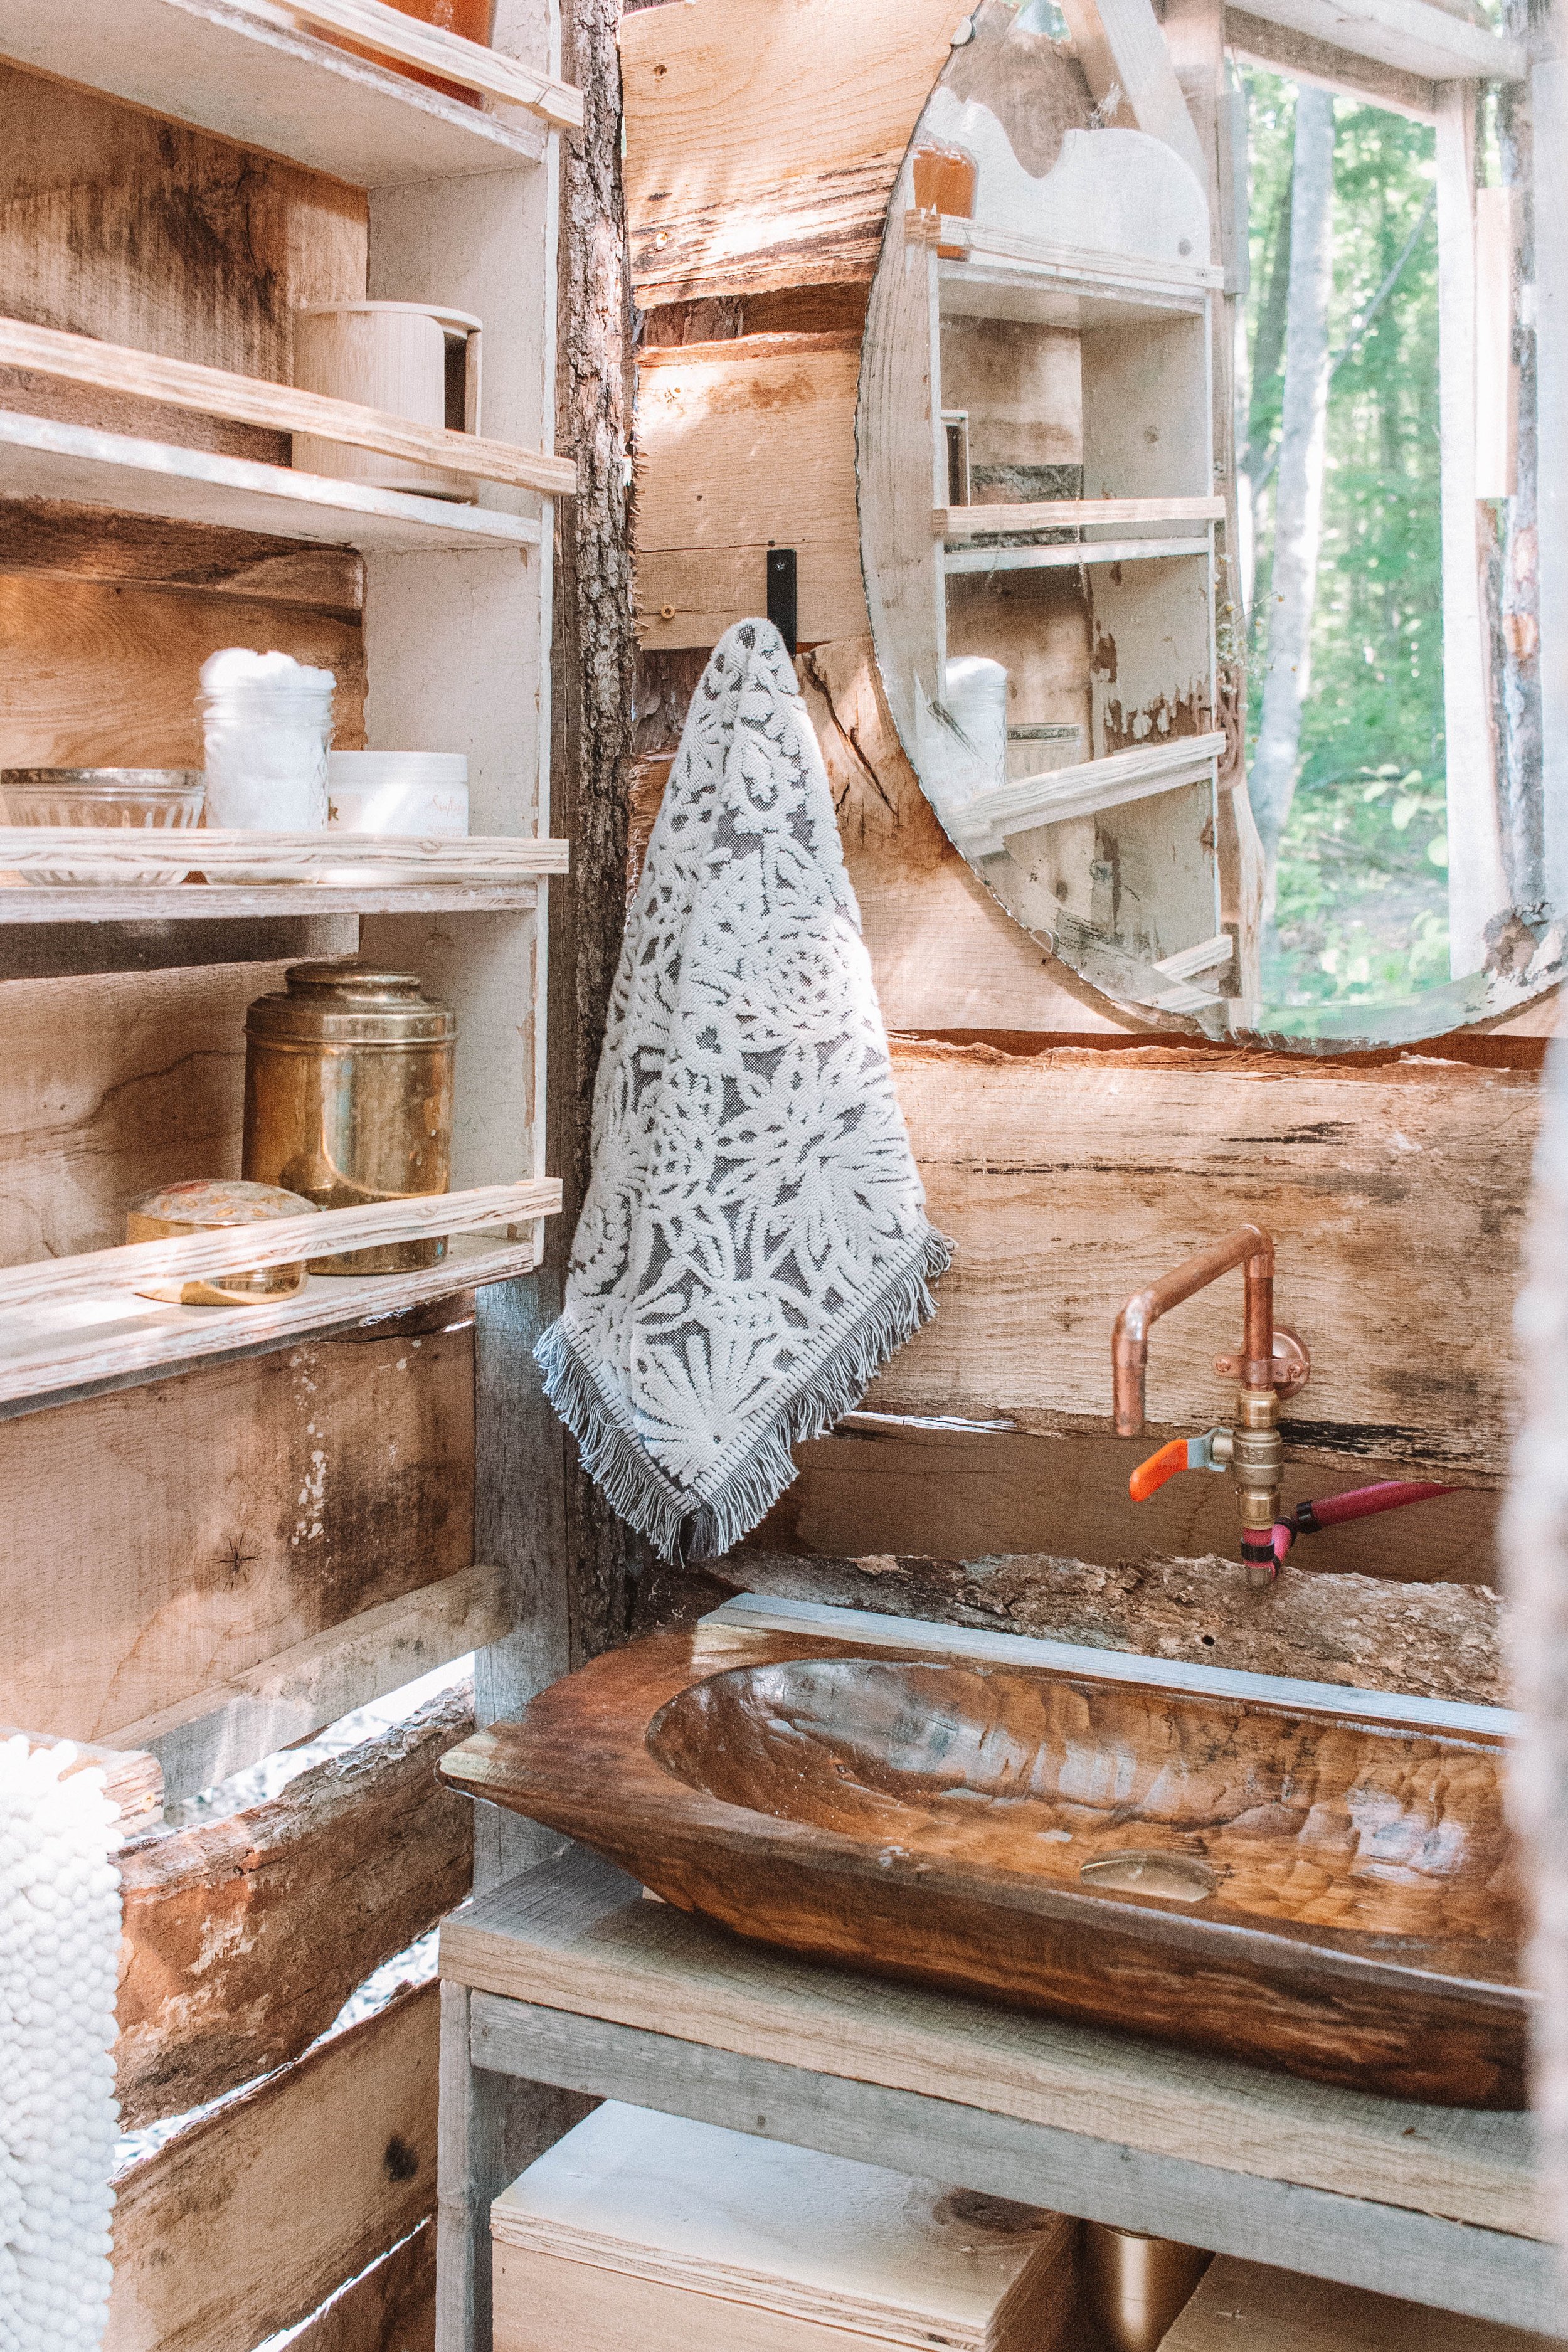
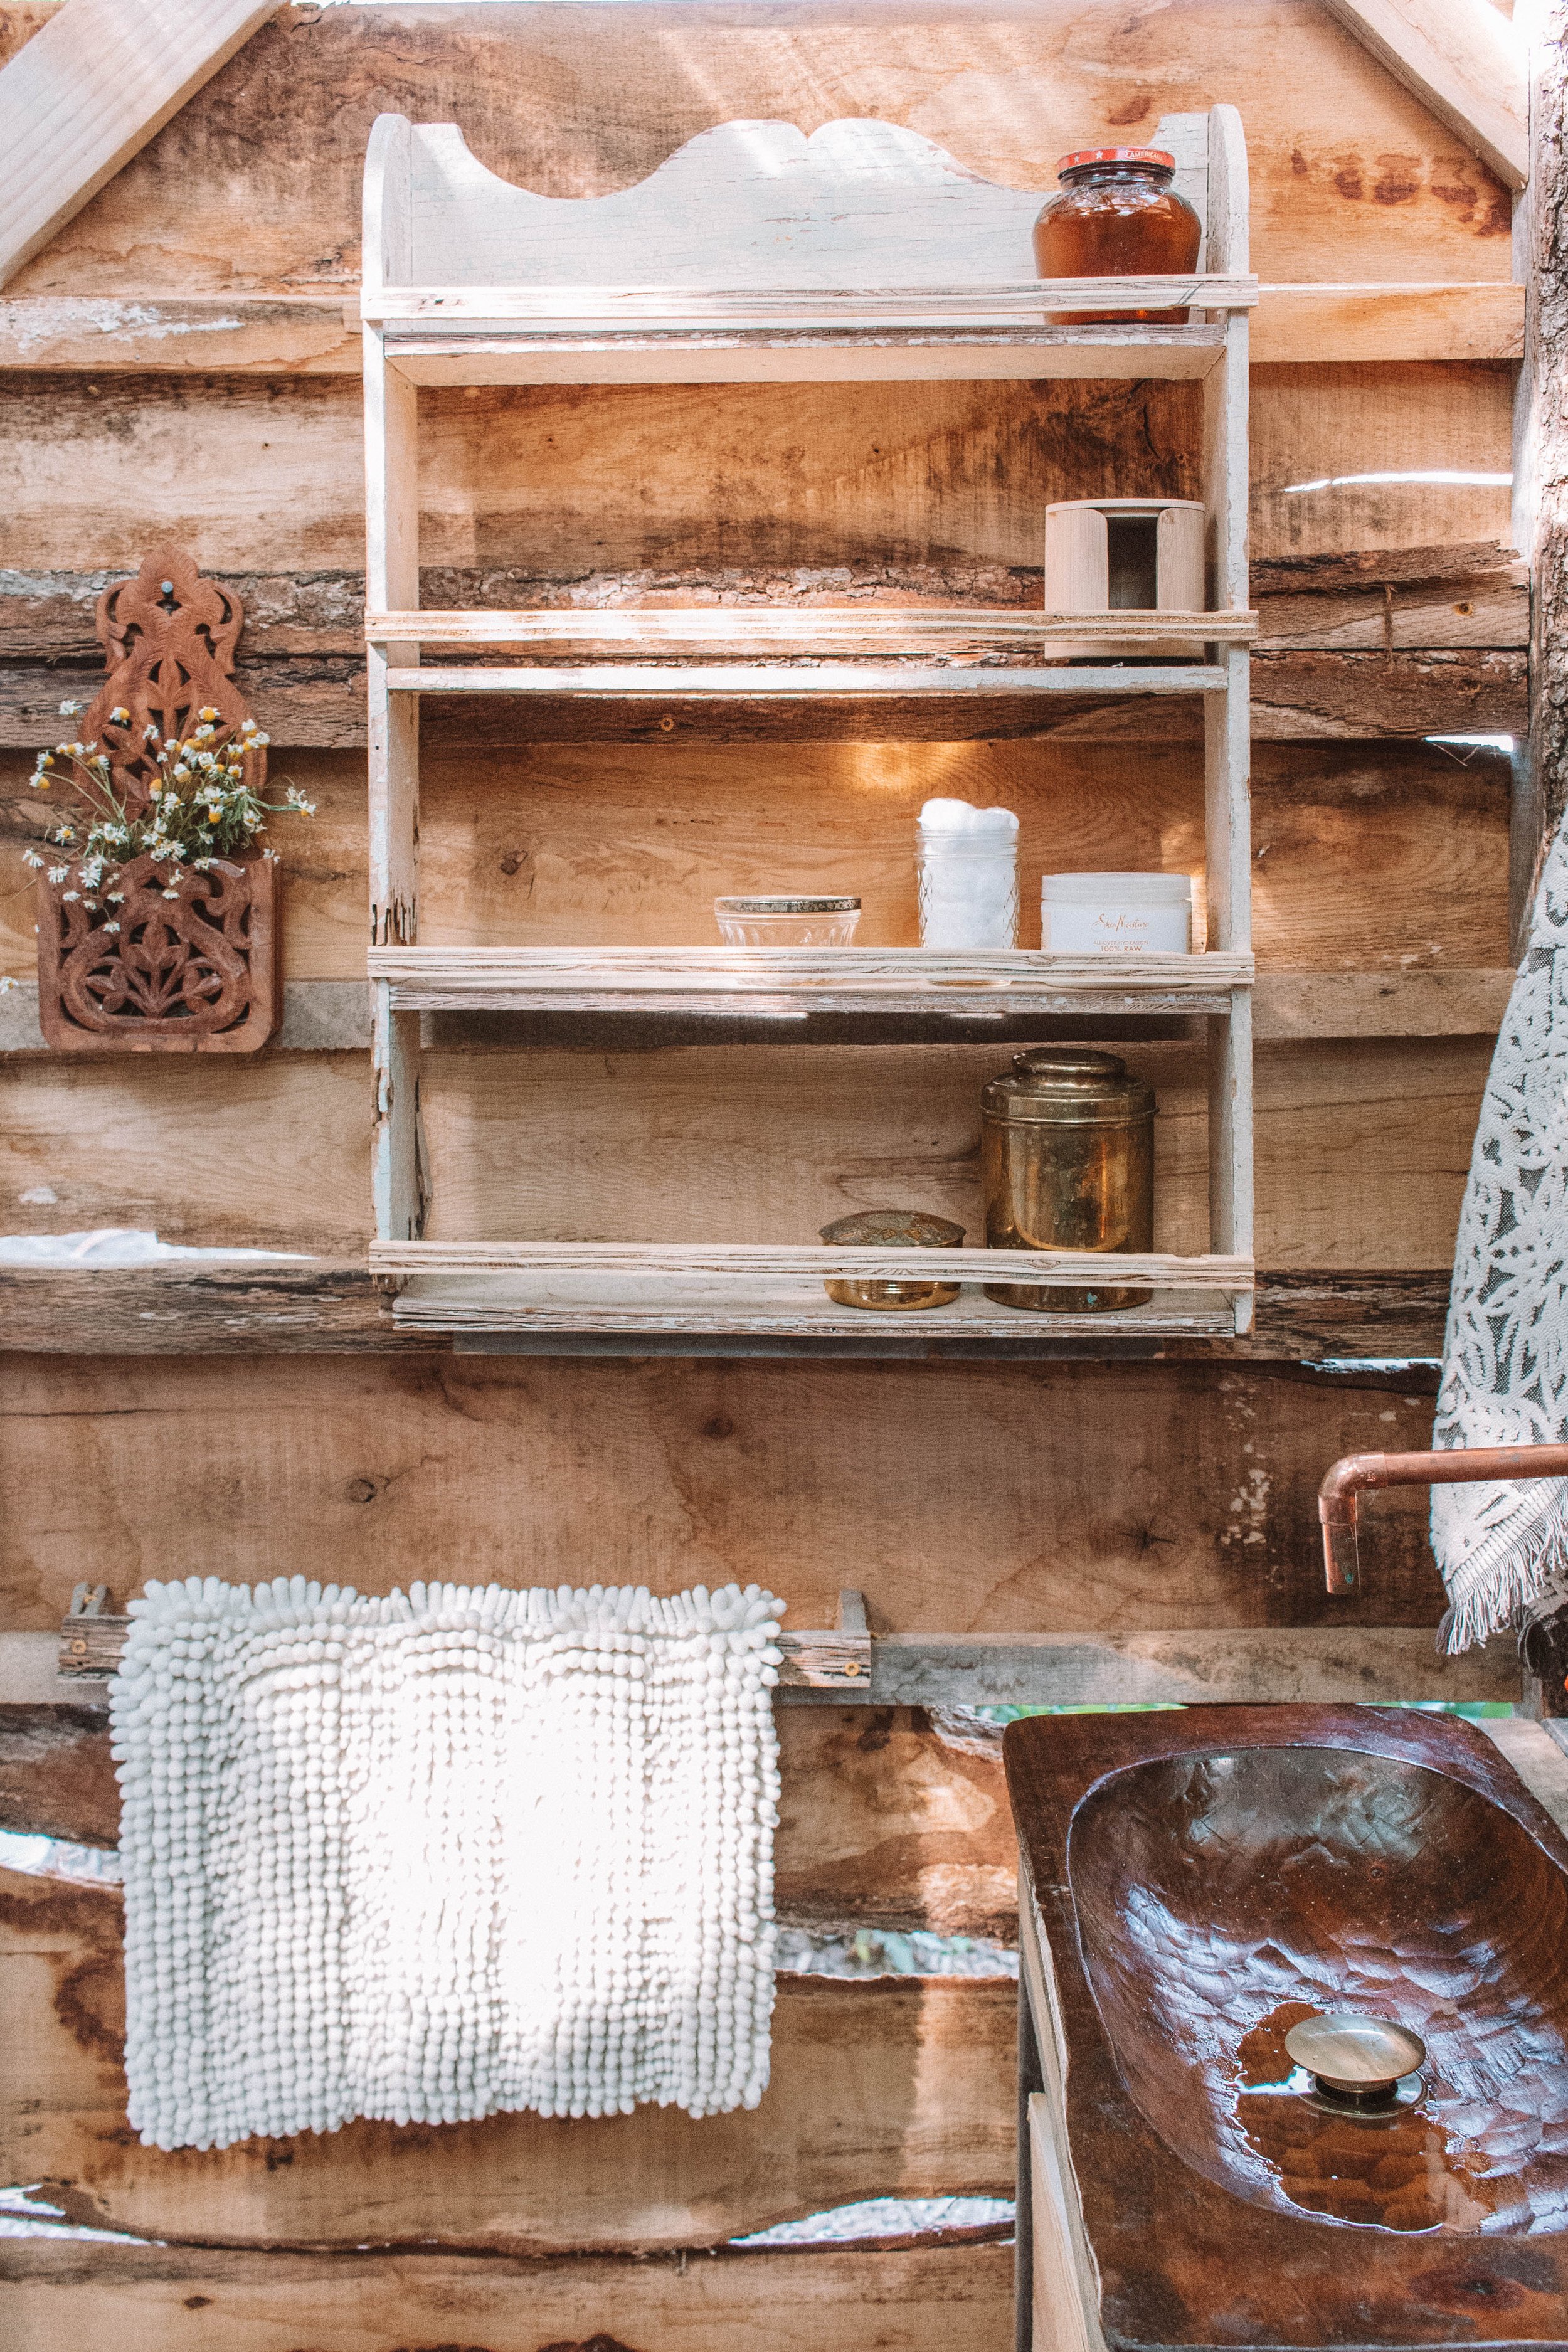
Our sink is plumbed right into the shower water. This gives us on-demand heated water which is very exciting! We had hot water in the bath house before we did in our actual house. We found the dough bowl at a flea market in Texas. I sealed the bowl will many layers of a satin varnish and then drilled a hole in the middle to add a drain.
I made the faucet out of copper pipe and some elbows along with a ball valve. It's super simple but does exactly what we need. Also, we like the copper look.
Landscaping
We wanted to use plants that gave a little bit of a tropical vibe, but let’s be honest, we live in the woods. It would be very hard to make the space look truly tropical without spending a ton of money. Instead we decided to incorporate some hardy tropical plants like the hardy banana trees and hostas. Both of these are able to survive our winters here. The hosta plants can easily be divided into multiple plants which is exactly what we did here. We also planted elephant ears that multiplied over the summer. It’s a toss up if the elephant ears will make it through the winter, TBD.
We used 16” pavers to make a pathway to the bathroom from both the pool area and the pathway to the house. Before this bathroom existed, we had pretty terrible pathways to our toilet and shower, so having solid places to step on the way to the bathroom were a must. We didn’t do all of this at the beginning, it was the absolute last project. But we knew when we chose this build site that we wanted to build up and plant a garden bed right in front. This is also one of the first things we did to our house was landscape in the front. It makes all the difference really!
DECOR + Finishing touches
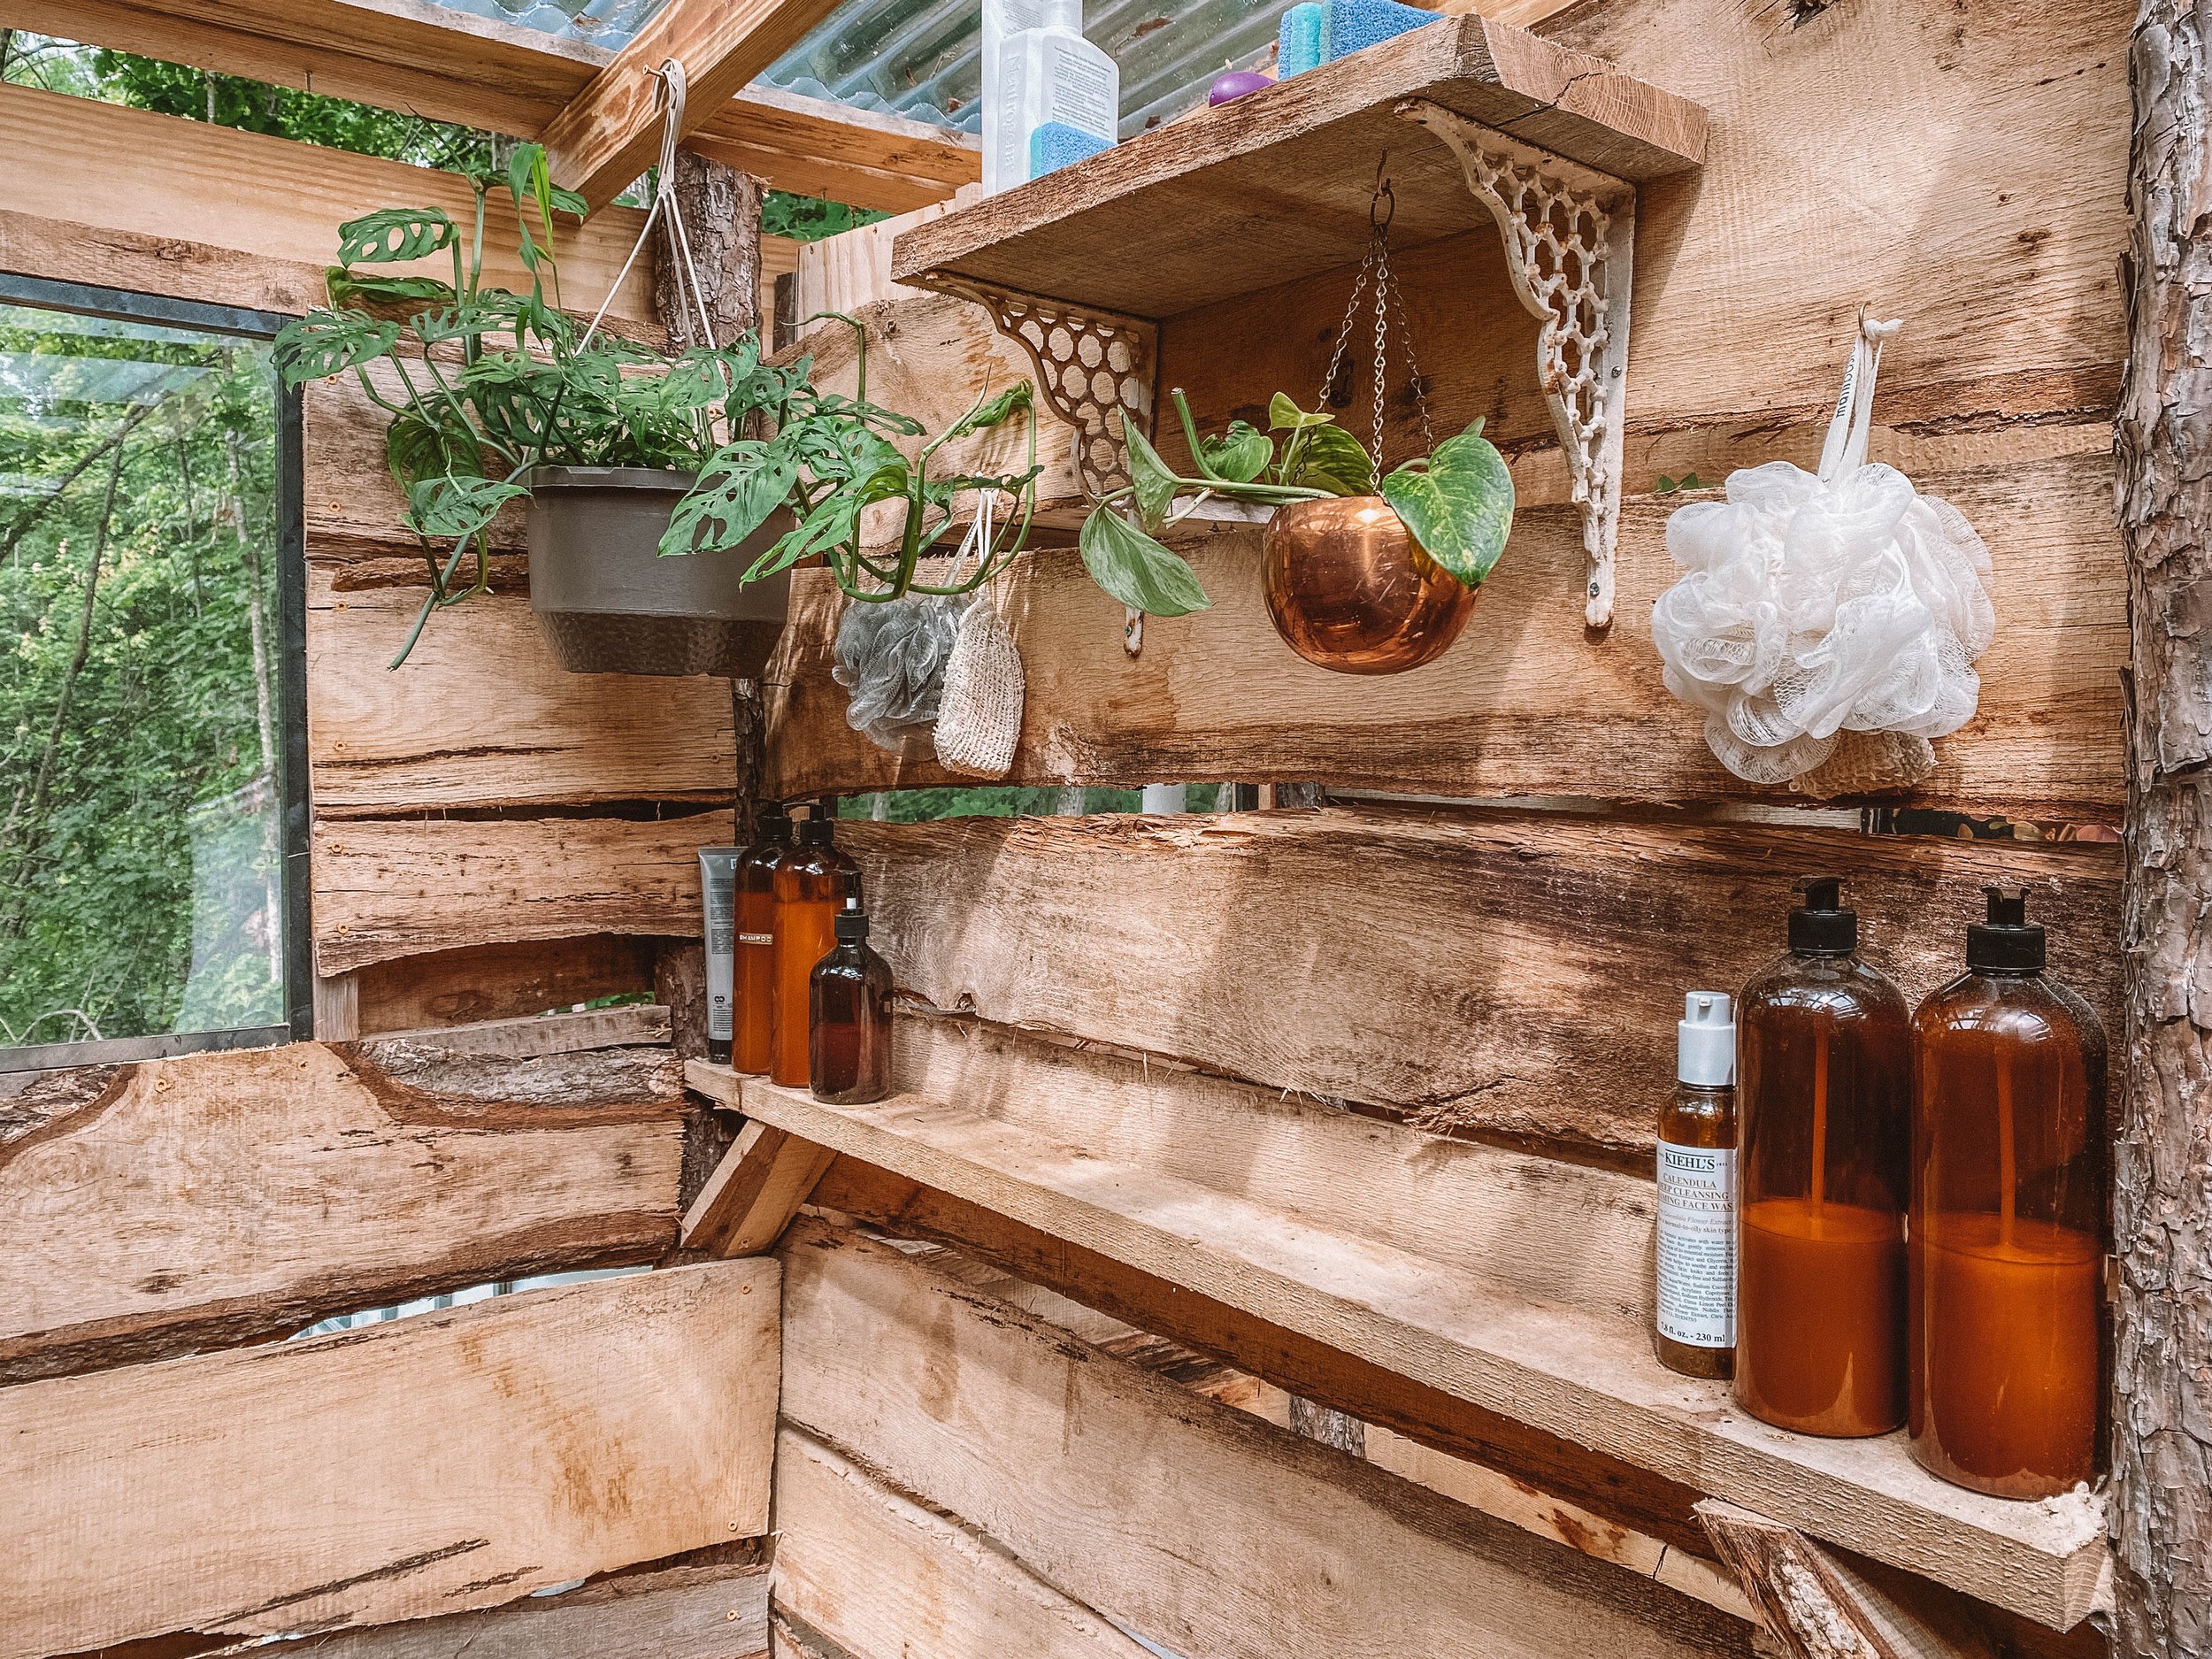
Since we were going for a Tulum-esque vibe, we made sure to have plenty of space for plants inside the bathroom. We also made sure that anything we brought in contributed to the rustic vibe. We got these shelf brackets from an antique store and they are very old looking. But they work great and fit in seamlessly.

We hung up these woven fixtures that we bought in Mexico years ago. We put our own lights in them and are happy to be able to use them instead of them just sitting in storage. I also built a cabinet above the toilet to store toilet paper and such.

I built some boxes to go on the shelf underneath the sink (which I also built) in order to store some of our extra bathroom things. They are built in a way that no bugs can get inside. The shelf hanging on the left is something Casey has had for over a decade and as you can see, it’s rustic. Another thing we got to pull out of storage! And then we have a little wood bar for our bath mat. We only put it down when using the shower. All the other times it is hanging here to dry and not get covered in dirt and mud from our shoes. Oh and I made a cover for the water heater! Since we are trying to make it look spa-like in here, I didn’t really want to see the white block of a water heater all the time. The mirror came from, you guessed it, an antique store.
Time Frame
We spent right at about 3 months on this project. It’s one of the first projects that we stayed focused on (sort of) and made sure to complete. In the beginning Casey was healing from a foot sprain, so I was working mostly on my own. When she was able to walk around again it was great to have her help again! The structure itself went up really quickly and we were using the bath house as our bath room in no time. Setting up all the systems is what took the longest, plus working around weather.

We are happy with how this project turned out and we have been able to welcome guests to our land now that we have a decent bathroom! My family came and visited and this bath house supported 7 people at one time. We are looking forward to one day having an indoor bathroom, but for now, we couldn’t be happier with where we are at.

And when the indoor bathroom does come, this one will still be out here by the pool ready to be used when needed!
If you’d like to see a video tour, check out the video above!


